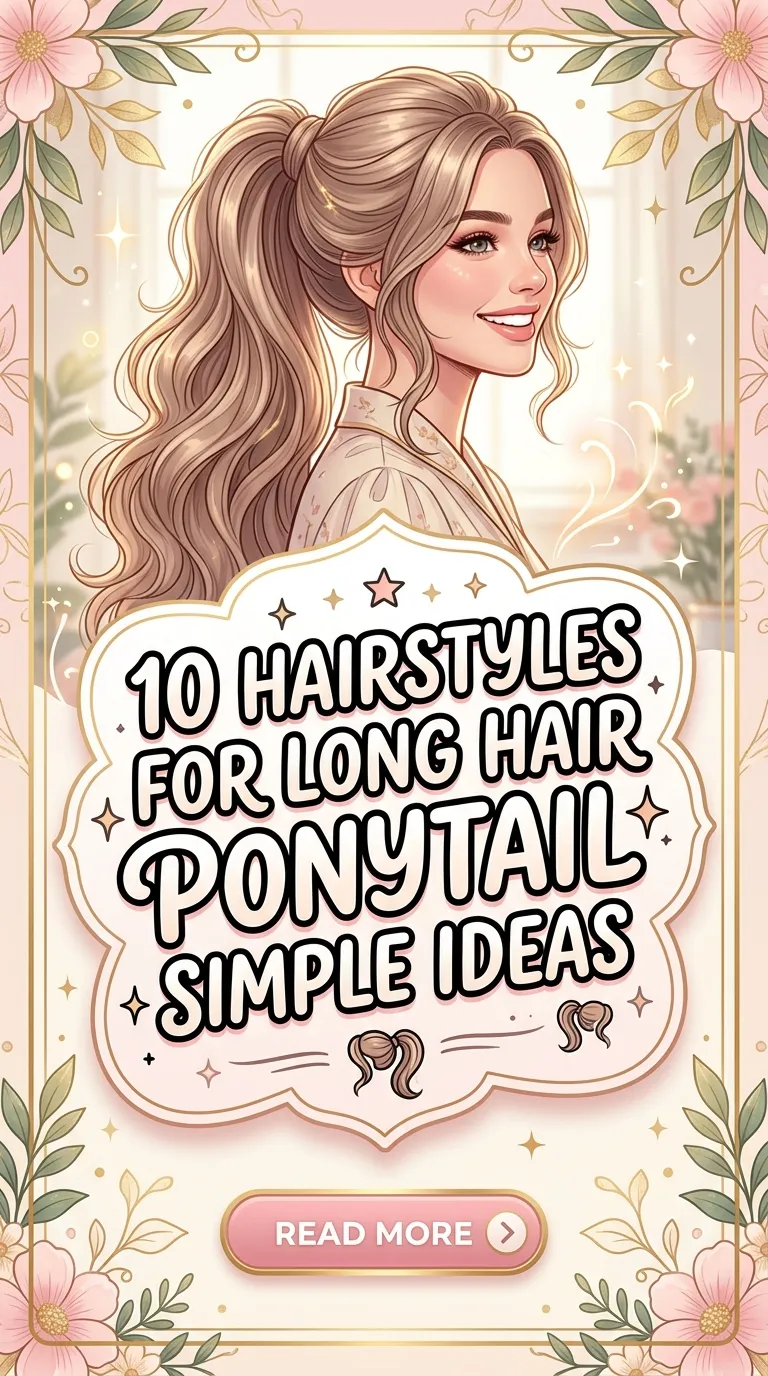
10 Easy Braided Hairstyles Ideas

Introduction
Braided hairstyles remain one of the most practical and visually appealing hair styling techniques used across cultures and fashion trends. On Pinterest, easy braid styles consistently appear among the most saved beauty and hair inspiration posts because they combine practicality with aesthetic appeal. Braids provide structure, organization, and versatility while allowing individuals to create polished hairstyles without requiring professional styling tools. Many braided styles can be completed at home with minimal materials, making them suitable for daily routines, casual events, work environments, and social occasions.
This guide presents ten easy braided hairstyle ideas designed for beginner friendly styling. Each hairstyle focuses on clear structure, simple techniques, and step-by-step execution that can be completed with basic tools such as combs, elastics, and hair clips. The article explains both the design concept and the practical process required to create each braid style successfully. Readers will also learn preparation methods, planning strategies, and styling techniques that improve results and ensure a clean final appearance.
These creative ideas work for a wide range of hair types and lengths, making them adaptable for different styling preferences. Whether the goal is everyday organization, aesthetic presentation, or experimenting with DIY hair tutorials, braided hairstyles offer a reliable and accessible creative project that transforms simple hair arrangements into structured and visually balanced designs.
Why This Idea Is Trending or Useful
Easy braided hairstyles have become a major category within Pinterest ideas because they combine practicality, creativity, and accessibility. Modern hair styling trends prioritize techniques that are simple to execute while still producing polished results. Braids naturally support this goal because they organize hair into stable structures that maintain shape throughout the day without constant adjustment. This makes braided styles highly useful for school routines, workdays, exercise, and social gatherings where long-lasting hairstyles are necessary.
Another reason braided hairstyles continue trending is their compatibility with DIY tutorials. Many users search for step by step hairstyle guides that allow them to recreate aesthetic looks without professional salon services. Braids can be learned gradually, beginning with simple three-strand patterns and expanding into more creative variations. This progression allows beginners to build skill while experimenting with new creative ideas.
Design relevance also plays an important role in the popularity of braided styles. Braids support both minimalist style and decorative aesthetics depending on how they are arranged. A single braid can create a clean, structured look, while multiple braids can add texture and dimension to modern hair design. Because braided hairstyles can be adapted for different hair textures, lengths, and occasions, they remain one of the most accessible beauty techniques shared on Pinterest for practical inspiration and everyday styling.
Materials and Preparation
Preparing properly before creating braided hairstyles improves efficiency and ensures smoother styling results. Although braids appear simple, organized preparation helps maintain even sections and balanced tension throughout the braid pattern. Most easy braided hairstyles require only a small set of basic materials that are commonly available in household grooming kits.
Essential materials include a wide-tooth comb for detangling hair before styling. Removing knots is an important preparation step because tangles disrupt the braid structure and make sections uneven. A fine-tooth comb can then be used to create precise hair partings when dividing hair into sections. Small elastic bands are required to secure braid ends and maintain the shape of the hairstyle throughout the day. Hair clips or sectioning clips help hold unused portions of hair in place while braiding other areas.
Preparation also involves planning the hairstyle structure. Before beginning, determine where the braid will start, how many sections will be used, and whether the style will involve one braid, two braids, or multiple braided patterns. Lightly brushing hair improves smoothness and allows strands to weave together neatly. For beginners, practicing with slightly damp hair can help maintain control while braiding.
By organizing materials and planning the braid layout beforehand, the entire DIY hairstyle process becomes faster, cleaner, and easier to complete with consistent results.
MAIN IDEAS
Idea 1: Classic Three-Strand Side Braid
How to Create
The classic three-strand side braid is one of the most beginner friendly braided hairstyles and serves as the foundation for many advanced braid techniques. This style organizes hair into a simple woven structure created by alternating three equal strands. The braid is positioned over one shoulder, which gives the hairstyle a relaxed and aesthetic appearance often used in casual Pinterest inspiration images. Because the braid rests along the side of the head rather than the back, the pattern remains visible and contributes to the visual balance of the hairstyle.
This braid style works well with medium to long hair lengths and can be adapted to various hair textures. The three-strand weaving method is also one of the easiest ways to learn braid control and strand management. Each strand crosses over the center strand in a repeating pattern, gradually forming the woven structure. The design creates symmetry while keeping hair securely gathered in one direction. This makes the hairstyle practical for everyday routines such as school, work, or outdoor activities.
The side braid also supports minimalist style preferences. It does not require decorative accessories or complicated patterns, yet it creates a structured and organized hairstyle. Because of its simple technique and reliable structure, this braid remains one of the most commonly shared easy project ideas in DIY hair tutorials.
The execution process begins by brushing hair thoroughly to remove tangles. After detangling, gather all hair toward one side of the head, positioning it over the shoulder. Divide the hair into three equal sections using fingers or a comb. These sections will form the braid strands.
Begin the braid by crossing the right strand over the middle strand so that it becomes the new center strand. Next, cross the left strand over the new center strand. Continue repeating this alternating motion. Each crossing movement pulls the outer strand toward the center while the previous center strand moves outward. Maintaining even tension is important to keep the braid uniform.
Continue the pattern until reaching the end of the hair length. Secure the braid with a small elastic band. For a slightly fuller appearance, gently loosen the outer edges of the braid after securing it. This technique creates a soft texture without disrupting the braid structure.
This hairstyle can be completed in only a few minutes and requires minimal materials, making it an efficient solution for daily hair organization and beginner braid practice.

Idea 2: Double Dutch Braids
Step-by-Step Guide
Double Dutch braids create a structured and symmetrical hairstyle by weaving two braids along the scalp on each side of the head. Unlike standard braids that cross strands over the center, Dutch braids use an underhand weaving technique where strands cross underneath the center section. This method causes the braid pattern to appear raised above the hair surface, producing a bold and clearly defined braid structure often featured in Pinterest hairstyle tutorials.
The design of double Dutch braids provides strong hair organization because the braids begin near the hairline and continue along the scalp toward the back of the head. This helps keep hair securely positioned throughout the day, making the style suitable for active routines, outdoor activities, or long workdays. The symmetrical layout also contributes to balanced visual structure, which is one reason the style frequently appears in trending ideas related to modern hair design.
Double Dutch braids also serve as a creative project for individuals learning scalp braiding techniques. The pattern introduces the concept of gradually adding hair sections while braiding, which is an essential skill used in many advanced braid styles. Because the technique follows a consistent pattern, beginners can learn the method through repeated practice and step by step execution.
To begin the hairstyle, brush hair thoroughly and create a straight center part from the forehead to the back of the head. Use hair clips to secure one side temporarily while working on the other side first. Take a small section of hair near the front hairline and divide it into three strands.
Begin the Dutch braid by crossing the right strand underneath the center strand rather than over it. Next, cross the left strand underneath the new center strand. Before repeating the pattern, add a small section of loose hair to each outer strand. Continue braiding by incorporating new hair sections as the braid moves along the scalp.
Maintain steady tension while weaving strands under the center section. Continue the braid until reaching the lower back of the head, then finish with a regular three-strand braid for the remaining hair length. Secure with an elastic band.
Repeat the same process on the opposite side of the head. The finished style creates two raised braids that run parallel along the scalp, forming a clean and structured hairstyle that combines practicality with strong visual symmetry.

Idea 3: Simple Crown Braid
How to Make
The crown braid creates a circular braid structure that frames the head like a halo. This hairstyle is often used for aesthetic Pinterest inspiration because it combines elegance with organized hair structure. The braid wraps around the head, keeping hair lifted away from the neck and shoulders while forming a balanced decorative pattern.
The crown braid works especially well for medium to long hair lengths because the circular braid requires enough hair to wrap around the head. The design distributes hair evenly across the braid pattern, preventing bulk from accumulating in one location. This helps maintain a lightweight and comfortable hairstyle throughout the day.
One practical advantage of the crown braid is its stability. Because the braid encircles the head, it naturally holds hair in place without frequent adjustments. This makes the style suitable for events, workdays, or outdoor activities where hair organization is important. The circular design also supports minimalist styling preferences by creating a structured yet simple braid pattern.
From a creative project perspective, the crown braid introduces the concept of directional braiding. Instead of braiding downward, the braid follows a curved path around the head. Learning this directional pattern helps expand braiding skills and encourages experimentation with different braid placements.
To create a crown braid, begin by brushing hair thoroughly to ensure smooth strands. Part the hair slightly to one side rather than directly in the center. Starting near the ear on the fuller side of the part, take a section of hair and divide it into three strands.
Begin braiding using a Dutch braid technique by crossing outer strands underneath the center strand. As the braid moves along the hairline, gradually add small sections of hair into the outer strands before crossing them under the center. Continue following the natural curve of the head.
Guide the braid around the back of the head and toward the opposite side. Maintain consistent tension to keep the braid secure and evenly spaced. Once reaching the starting point, continue braiding the remaining hair length normally.
Wrap the remaining braid underneath the circular braid and secure it with hair pins or a small elastic band. The finished result forms a continuous braid that surrounds the head, creating a balanced hairstyle with strong visual structure and practical hair organization.

Idea 4: Loose Boho Braid
How to Create
The loose boho braid emphasizes relaxed structure and natural texture while maintaining the woven braid pattern. This hairstyle frequently appears in Pinterest aesthetic inspiration because it combines simple braiding techniques with a softer, less rigid finish. Instead of tightly weaving strands, the braid is intentionally loosened to create volume and texture. This approach produces a casual appearance while still keeping hair organized.
The boho braid works well for individuals who prefer a natural hairstyle that does not require precise sectioning or strong tension. The braid structure remains visible, but the strands are gently expanded to create a wider, textured braid pattern. This design supports modern minimalist style trends that focus on effortless presentation rather than perfectly tight braiding.
Another advantage of the loose braid style is its flexibility. The braid can be positioned along the back of the head, across one shoulder, or slightly off-center depending on the desired look. This versatility makes the hairstyle adaptable for different hair lengths and everyday situations.
From a creative project perspective, the loose braid introduces a styling technique known as braid expansion. After completing the braid, individual braid loops are gently pulled outward to create volume. This step transforms a simple braid into a fuller and more textured hairstyle without changing the original braid structure.
To create the loose boho braid, begin by brushing hair lightly to remove tangles while maintaining natural volume. Gather the hair at the back of the head or slightly to one side depending on the desired braid position. Divide the hair into three equal strands.
Create a standard three-strand braid by crossing the outer strands over the center strand in alternating order. Continue the pattern until reaching the end of the hair length. Secure the braid with a small elastic band.
Once the braid is complete, gently pull outward on the outer loops of each braid section starting from the top and moving downward. This technique widens the braid and creates a relaxed texture. Avoid pulling too strongly to maintain the braid structure.
The finished braid appears fuller and softer than a traditional braid while still maintaining a clear woven pattern. This simple adjustment creates a hairstyle that blends practical organization with aesthetic styling.

Idea 5: Half-Up Braided Style
Setup Method
The half-up braided hairstyle combines loose hair with a small braid structure positioned in the upper section of the head. This design allows part of the hair to remain flowing while the braided section provides structure and visual detail. The style is commonly featured in Pinterest inspiration boards because it creates balance between organized styling and natural hair movement.
The half-up braid is particularly useful for managing hair around the face. By braiding only the upper section, the hairstyle keeps front strands secured while leaving the remaining hair free. This makes the style practical for daily routines where hair organization is necessary but a fully braided hairstyle is not required.
The design also supports minimalist hair aesthetics because it adds decorative detail without excessive complexity. The braid acts as a central feature that enhances the hairstyle while maintaining a simple structure. Because only a small portion of hair is braided, the style is beginner friendly and quick to complete.
This hairstyle works well with different braid patterns including three-strand braids, fishtail braids, or small side braids that join together at the back. Regardless of the braid type used, the overall design follows the same structure of combining braided and loose hair elements.
To create the half-up braided style, begin by brushing hair thoroughly. Section off the top portion of hair starting slightly above the temples and extending toward the back of the head. Secure the remaining lower hair with a temporary clip while working on the upper section.
Divide the upper section into three strands and create a standard three-strand braid. Continue braiding until reaching the midpoint of the head. Secure the braid with a small elastic band.
Release the lower section of hair and allow it to fall naturally beneath the braid. The braid now sits above the loose hair, forming a layered hairstyle with both structured and flowing elements. This simple design provides practical hair organization while maintaining a soft and balanced appearance.

Idea 6: Simple Fishtail Braid
How to Create
The fishtail braid is a visually detailed braid pattern created by weaving small strands from opposite sides of the hair into the center. Unlike traditional three-strand braids, the fishtail braid uses only two main sections. Thin pieces are alternately taken from each section and crossed over to the opposite side. This process gradually forms a tightly woven pattern that resembles the structure of a fish skeleton.
The fishtail braid often appears in Pinterest hairstyle inspiration because of its intricate appearance despite using a relatively simple technique. The repeating crossing pattern produces a symmetrical braid with fine texture and strong visual detail. This makes the braid suitable for both casual and slightly formal hairstyles.
Another advantage of the fishtail braid is its flexibility in tension and thickness. The braid can be woven tightly to produce a neat, narrow braid, or it can be gently expanded to create a wider, textured design. This allows individuals to adapt the braid according to their styling preference or the occasion.
From a learning perspective, the fishtail braid helps beginners develop precision when handling small hair sections. Because each step involves moving a thin strand across the braid, the technique improves coordination and strand control during braiding.
To create the fishtail braid, begin by gathering hair into a low ponytail at the back of the head. Divide the ponytail into two equal sections. Take a thin strand from the outer edge of the right section and cross it over to the inside of the left section.
Next, take a thin strand from the outer edge of the left section and cross it over to the inside of the right section. Continue repeating this alternating process. Each small strand transfer gradually forms the woven fishtail pattern.
Maintain even tension while weaving to keep the braid symmetrical. Continue the process until reaching the end of the hair. Secure the braid with an elastic band. For a fuller appearance, gently pull outward on the braid loops to expand the pattern slightly.

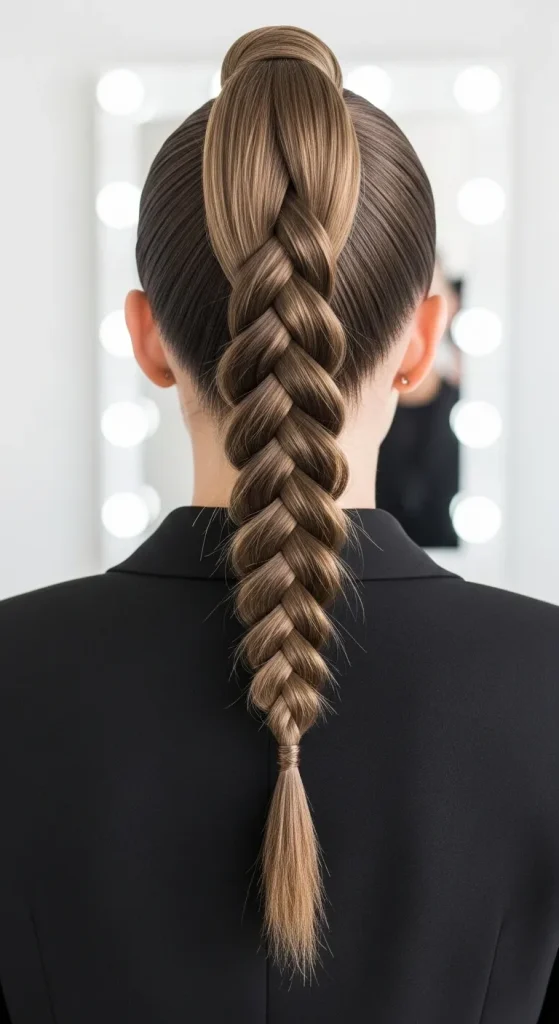
Idea 7: Braided Ponytail
Execution Process
The braided ponytail combines two basic hairstyle structures: a ponytail and a braid. This combination creates a hairstyle that is both highly practical and visually structured. The ponytail gathers hair into one controlled section, while the braid organizes the length of the ponytail into a woven pattern. This style appears frequently in Pinterest hairstyle tutorials because it provides a polished appearance while remaining simple enough for everyday routines.
The design of a braided ponytail improves hair organization during active situations such as exercise, work tasks, or long outdoor activities. A loose ponytail can shift or tangle throughout the day, but braiding the ponytail helps maintain structure and prevents hair strands from separating. The braid also distributes the hair evenly along its length, which reduces bulk at the base of the ponytail and creates a balanced shape.
From a visual perspective, the braided ponytail adds texture and pattern to a hairstyle that would otherwise remain plain. The woven design introduces repeated lines that contribute to a clean and modern aesthetic. Because the braid forms along the length of the ponytail, the pattern remains clearly visible, making it suitable for minimalist style preferences that still emphasize organized detail.
Another advantage of the braided ponytail is its adaptability. The ponytail can be positioned high on the crown, at the middle of the head, or low near the neckline depending on the desired look. Each placement changes the overall silhouette of the hairstyle while maintaining the same braid technique. This flexibility makes the style suitable for various settings including school routines, workplace environments, or casual social activities.
To create a braided ponytail, begin by brushing the hair thoroughly to remove tangles. Smooth hair toward the back of the head and gather it into a ponytail at the chosen height. Use a strong elastic band to secure the ponytail firmly so it remains stable during braiding.
Once the ponytail is secured, divide the hair into three equal sections. Begin a standard three-strand braid by crossing the right section over the center section. Next, cross the left section over the new center section. Continue alternating these crossings while moving downward along the ponytail length.
Maintain consistent tension so the braid remains even from top to bottom. If the braid becomes loose near the base, gently tighten the strands before continuing. Continue braiding until reaching the end of the hair length. Secure the braid with a small elastic band.
For a slightly fuller appearance, lightly pull outward on the braid loops after securing the end. This technique widens the braid slightly without disrupting the woven structure. The finished hairstyle combines the stability of a ponytail with the organized texture of a braid, creating a practical and aesthetically balanced design.

Idea 8: Rope Twist Braid
How to Make
The rope twist braid is a simple hairstyle that creates the appearance of a braided structure using a twisting technique rather than traditional strand weaving. This style is frequently included in beginner friendly Pinterest ideas because it requires minimal practice while still producing a clean and structured result. The design is created by twisting two hair sections individually and then wrapping them around each other to form a rope-like spiral pattern.
This hairstyle is especially useful for individuals learning basic hair styling techniques because it introduces the concept of controlled tension and directional twisting. Unlike traditional braids that involve multiple strand crossings, the rope braid relies on repeated twisting movements. When each section is twisted in the same direction and then wrapped together in the opposite direction, the strands lock into place and maintain their spiral structure.
The rope braid produces a smooth and symmetrical design that works well with minimalist hairstyle preferences. Because the strands follow a consistent twisting pattern, the finished braid appears sleek and organized. This makes it suitable for situations where a simple yet polished hairstyle is needed, such as school days, work environments, or everyday errands.
Another advantage of the rope twist braid is its speed. The entire hairstyle can often be completed in only a few minutes, making it one of the most efficient DIY hairstyle options. It can be used as a full ponytail braid, a side braid, or even incorporated into half-up hairstyles for additional texture.
To create a rope twist braid, begin by gathering hair into a ponytail at the back of the head or slightly to one side. Secure the ponytail with an elastic band. Divide the ponytail into two equal sections.
Take the first section and twist it tightly in a clockwise direction from the base to the end. Hold the twist securely so it does not unwind. Next, twist the second section in the same clockwise direction.
Once both sections are twisted individually, wrap them around each other in the opposite direction, which would be counterclockwise in this case. Continue wrapping the strands together until reaching the end of the hair. Secure the rope braid with a small elastic band.
The finished braid forms a smooth spiral that resembles a twisted rope. This simple technique creates a neat and organized hairstyle with minimal effort and materials.
Idea 9: Accent Side Braid
Step-by-Step Guide
The accent side braid is a subtle hairstyle element that adds decorative detail without changing the overall structure of the hair. Instead of braiding the entire head of hair, a small braid is created along one side while the rest of the hair remains loose. This style is widely used in Pinterest hairstyle inspiration because it introduces a creative detail while maintaining a natural and relaxed appearance.
The purpose of the accent braid is to create a focal point within an otherwise simple hairstyle. By braiding a narrow section of hair near the temple or above the ear, the braid forms a visible design line that contrasts with the loose strands surrounding it. This contrast adds dimension and visual interest while still preserving the simplicity of the hairstyle.
This technique is especially useful for individuals who prefer easy projects that require minimal time and materials. Because the braid involves only a small section of hair, the entire process can be completed quickly. The style also allows flexibility in braid placement, which means the braid can be positioned closer to the front hairline or slightly farther back depending on the desired look.
Another advantage of the accent side braid is its compatibility with different hair lengths and textures. Whether the hair is straight, wavy, or slightly curly, the braid provides structure while the remaining hair maintains its natural form. This combination creates a balanced hairstyle suitable for both casual and semi-formal settings.
To create the accent side braid, begin by brushing the hair gently to remove tangles. Identify a narrow section of hair near one temple or just above the ear. Separate this section from the rest of the hair and hold it firmly.
Divide the section into three small strands and begin a standard three-strand braid. Cross the outer strands over the center strand in alternating order while maintaining light tension. Because the braid is small, careful strand control helps maintain a neat appearance.
Continue braiding until reaching the end of the section. Secure the braid with a small clear elastic band. Allow the rest of the hair to remain loose around the braid. The finished hairstyle features a thin braided accent that adds texture and detail without requiring complex styling.

Idea 10: Braided Bun
Setup Method
The braided bun combines two classic hair organization techniques: braiding and bun formation. This hairstyle gathers hair into a compact bun while incorporating a braid structure that adds texture and visual detail. The style is commonly featured in Pinterest home styling and beauty inspiration boards because it offers a clean, organized appearance suitable for many situations.
The design of the braided bun focuses on efficiency and stability. By braiding the hair before forming the bun, the strands remain tightly organized and less likely to loosen during the day. The braid also distributes hair evenly around the bun structure, creating a balanced shape that holds its form longer than a traditional loose bun.
This hairstyle is particularly useful for individuals who need a reliable hair arrangement for long workdays or formal settings where neat presentation is important. The braided structure keeps stray strands contained, while the bun lifts hair away from the neck and shoulders for improved comfort.
From an aesthetic perspective, the braided bun introduces texture into an otherwise smooth hairstyle. The woven braid pattern remains visible as it wraps around the bun, creating layered detail that enhances the overall design. This combination of structure and simplicity makes the style compatible with minimalist fashion trends.
To create a braided bun, begin by brushing hair thoroughly and gathering it into a ponytail at the back of the head. Secure the ponytail with an elastic band. Divide the ponytail into three sections and create a standard three-strand braid along the length of the ponytail.
Once the braid reaches the end of the hair, secure it with another elastic band. Next, wrap the braid around the base of the ponytail to form a circular bun shape. Continue wrapping until the entire braid forms a spiral around the center.
Use hair pins or clips to secure the bun firmly against the head. Adjust the braid slightly if needed to maintain an even circular shape. The finished hairstyle combines the strength of a braid with the compact structure of a bun, producing a neat and organized hairstyle suitable for many occasions.

Common Beginner Mistakes and How to Avoid Them
One common mistake when creating braided hairstyles is starting the braid without properly detangling the hair. Knots and uneven strands disrupt the braid pattern and make it difficult to maintain consistent tension. Always brush hair thoroughly before beginning the styling process. Another frequent issue occurs when hair sections are not divided evenly. Unequal strand sizes lead to asymmetrical braid patterns that appear unbalanced. Using a comb to divide strands carefully helps maintain uniform structure.
Many beginners also apply inconsistent tension while braiding. If some sections are pulled tightly while others remain loose, the braid will appear uneven and may loosen quickly. Maintaining steady pressure while weaving strands helps keep the braid secure and balanced. Another mistake involves rushing the braid process. Quick movements often lead to tangled strands or missed sections, which weakens the overall braid structure.
Finally, beginners sometimes secure braids too loosely or too tightly with elastic bands. A loose band allows the braid to unravel, while excessive tightness may cause discomfort. Using appropriately sized elastics and securing them firmly without excessive pressure helps maintain both comfort and durability.
Practical Tips for Better Results
Achieving clean braided hairstyles requires attention to small styling details that improve the final appearance. One effective technique is maintaining clear section control throughout the braiding process. Keeping strands separated with fingers while weaving prevents them from mixing or tangling. Practicing slower braid movements also improves precision and helps beginners develop stronger coordination when handling multiple strands.
Working with slightly damp hair can improve control when creating braids. Damp hair strands tend to stay together more easily, reducing flyaway strands during braiding. However, hair should not be overly wet because excessive moisture can cause uneven tension once the hair dries.
Consistent strand thickness is another important factor. When adding hair sections during scalp braiding techniques, always incorporate similar amounts of hair to maintain symmetrical braid patterns. Using a mirror setup that shows both the front and back of the head can also help monitor braid alignment and ensure that the hairstyle remains centered.
Regular practice plays a major role in improving braiding speed and accuracy. Repeating simple braid techniques gradually builds muscle memory, allowing more advanced styles to be completed with confidence.
Styling, Presentation, or Organization Ideas
The presentation of braided hairstyles can influence how structured and polished the final style appears. One effective styling method involves adjusting braid placement according to face shape and hair length. For example, side braids create soft framing around the face, while centered braids provide a balanced symmetrical look.
Layered styling can also enhance braid visibility. Combining braids with loose hair sections allows the braid to act as a focal point within the hairstyle. This approach works well for half-up braid designs where the braid sits above flowing hair strands. Another presentation technique involves gently expanding braid loops after completion to create additional texture and volume.
Hair accessories can be used carefully to support braid organization without overwhelming the design. Small clips or pins can secure braids around buns or crown styles to maintain shape. However, minimalist presentation often works best because the braid pattern itself provides sufficient visual interest.
Organizing braids symmetrically across the head also improves aesthetic balance. Even spacing between multiple braids helps create a structured hairstyle that appears intentional and carefully styled.
Budget or Time Planning
Easy braided hairstyles remain popular partly because they require minimal financial investment and very little preparation time. Most braid styles rely on basic grooming tools that are already available in many households. Simple materials such as combs, elastic bands, and hair clips are sufficient for completing most DIY braid tutorials.
Planning hairstyle time efficiently is also important for daily routines. Basic braid styles such as side braids, braided ponytails, or rope twists can typically be completed within five to ten minutes. More complex styles such as crown braids or Dutch braids may require additional time during the learning stage but become faster with practice.
Preparing materials in advance also helps reduce styling time. Keeping a small container with elastics, clips, and combs makes it easier to start the hairstyle process quickly. Practicing braid techniques during relaxed moments rather than busy mornings also helps improve speed and confidence.
By organizing tools and choosing beginner friendly styles, individuals can complete attractive braided hairstyles without significant time or financial investment.
Creative Expansion and Advanced Inspiration
Once basic braid techniques are mastered, they can be expanded into more advanced creative ideas that combine multiple braid styles. For example, double Dutch braids can be joined into a braided bun, creating a hairstyle that blends scalp braiding with structured bun organization. Similarly, fishtail braids can be incorporated into half-up hairstyles to add intricate texture.
Another creative expansion involves mixing braid sizes. Thin accent braids can be combined with larger primary braids to create layered braid patterns that enhance visual depth. This technique is commonly seen in Pinterest aesthetic hairstyle collections because it introduces contrast within the braid structure.
Directional braiding can also create new hairstyle variations. Braids can be positioned diagonally, vertically, or wrapped around the head to produce different shapes. Experimenting with braid placement encourages creative exploration while maintaining the same basic techniques.
Practicing these variations gradually builds braiding confidence and expands hairstyle possibilities. By combining simple braid patterns in new ways, a wide range of handmade hairstyle designs can be created while still using the same foundational braiding skills.