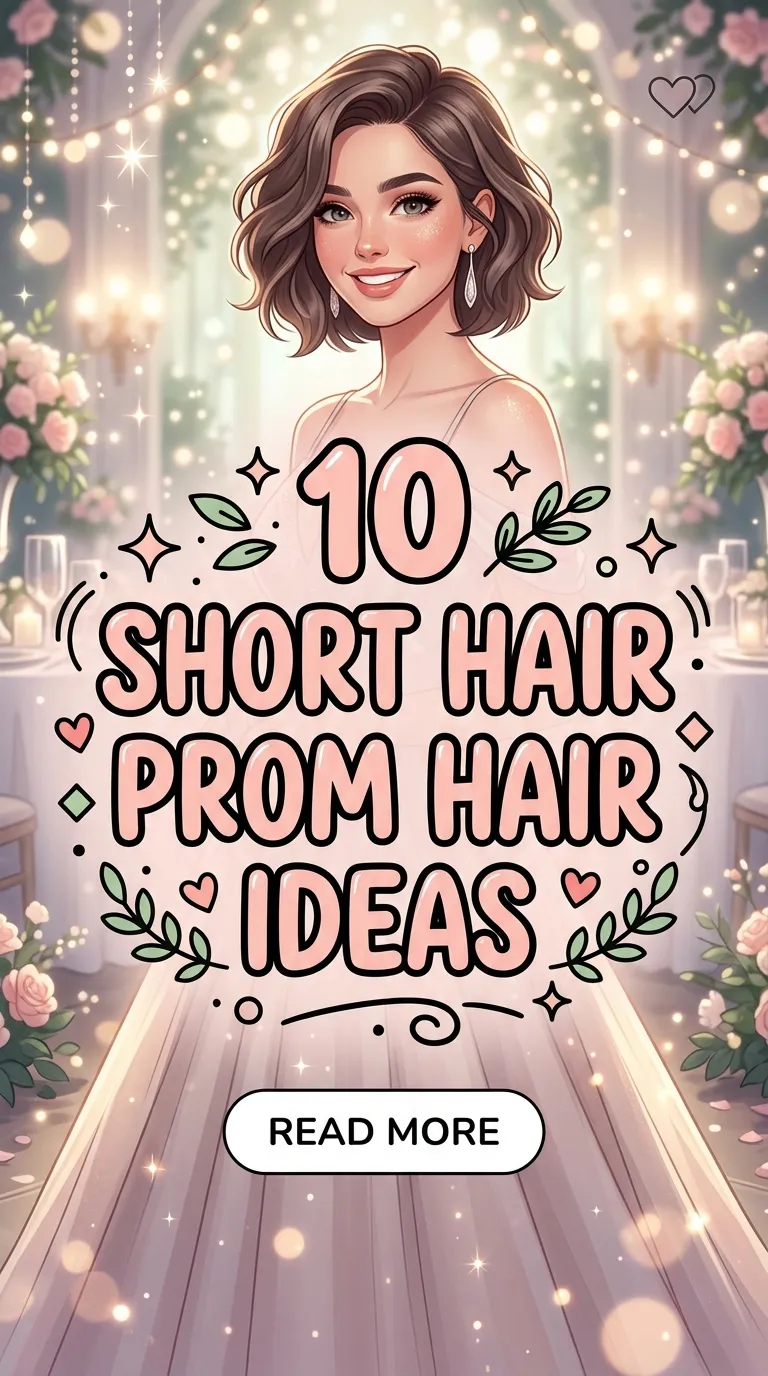
10 Prom Hairstyles for Long Hair Ideas

Introduction
Prom is a formal event where personal style, grooming, and presentation play an important role in creating a polished appearance. Hairstyles are one of the most noticeable elements of prom preparation, especially for individuals with long hair. Long hair offers a wide range of styling possibilities because its length allows braiding, curling, twisting, layering, and sculpting techniques that shorter hair cannot easily achieve. On platforms focused on visual inspiration, particularly Pinterest ideas boards, long prom hairstyles often appear as trending ideas because they combine elegance, creativity, and practical styling methods.
This article explores ten detailed prom hairstyles for long hair ideas that can be recreated through clear, beginner friendly techniques. Each hairstyle focuses on structure, balance, and styling methods that produce a refined result suitable for formal events. The goal is to provide clear explanations of each hairstyle concept while also offering practical step by step creation guidance that can be followed at home or used as preparation before visiting a stylist.
Readers will learn how different braiding methods, curls, buns, and layered styling approaches can transform long hair into visually structured prom looks. The article also explains preparation techniques, useful materials, and practical styling tips that help improve the final result. These hairstyles combine aesthetic appeal with realistic execution, making them suitable creative projects for anyone planning a memorable prom look.
Why This Idea Is Trending or Useful
Prom hairstyle inspiration is widely shared on visual platforms because people often search for creative ideas that help them plan a complete formal appearance. Long hair hairstyles remain especially popular because they provide flexibility for creating elegant designs without requiring complicated tools or professional training. Pinterest inspiration boards frequently feature long hairstyles due to their versatility and visual impact. Braids, curls, layered waves, and structured buns photograph well, which increases their popularity among users searching for trending ideas.
Another reason these hairstyles are widely shared is their accessibility. Many prom hairstyles for long hair can be recreated with basic tools such as curling irons, hair pins, elastic bands, and styling sprays. This makes them suitable DIY projects for beginners who want to experiment with formal hair styling without needing advanced salon skills. The step by step methods used in modern tutorials allow individuals to replicate professional-looking hairstyles through clear preparation and organized styling.
Design relevance also contributes to their popularity. Formal hairstyles often combine modern design principles such as balance, symmetry, texture, and controlled volume. These elements create hairstyles that appear structured yet natural, making them ideal for formal photography and event styling. Long hair also allows decorative elements such as braids, twists, or subtle layering, which helps produce visually interesting styles that feel elegant without appearing overly complicated.
Materials and Preparation
Successful hairstyling begins with preparation. Preparing hair correctly ensures that the style holds its shape throughout the event while maintaining a smooth and polished appearance. Before starting any hairstyle from this guide, the hair should be washed and fully dried. Clean hair provides a better foundation for curling, braiding, and pinning techniques. Slightly textured hair often holds styles more effectively than freshly conditioned hair that is extremely smooth.
Several basic materials are commonly used when creating prom hairstyles for long hair. Hair elastics are essential for securing braids, ponytails, and partial sections during the styling process. Hair pins and bobby pins help anchor twists and buns in place. A curling iron or large barrel curling tool can add soft waves and volume, which many formal hairstyles rely on for texture. A hairbrush and fine-tooth comb are necessary for sectioning and smoothing hair while styling.
Hair styling spray can help maintain structure once the hairstyle is completed. Some styles also benefit from light volumizing products applied at the roots before styling begins. Planning the hairstyle in advance is also an important step. Reviewing Pinterest inspiration images helps determine which hairstyle works best with hair thickness, texture, and personal style preferences.
Preparing a clean workspace with good lighting, mirrors, and organized tools improves the styling process. Taking time to section hair carefully and follow each step gradually helps beginners achieve more balanced and professional-looking results.
MAIN IDEAS SECTION
Idea 1: Classic Loose Hollywood Waves
How to Create
Classic loose waves are widely recognized as one of the most elegant hairstyles for long hair. This style focuses on smooth, flowing curls that create a structured wave pattern while maintaining softness and natural movement. The defining feature of this hairstyle is the consistent wave pattern that travels through the length of the hair. This produces a polished appearance often associated with formal events and red carpet styling. Because the waves are brushed out after curling, the hairstyle appears smooth rather than tightly curled.
The overall design relies on symmetry and shine. Long hair works particularly well for this look because the waves have enough length to cascade naturally over the shoulders. The result is a hairstyle that balances glamour with simplicity. Loose waves also pair well with various dress styles and accessories, which makes them a reliable choice for formal events like prom. This hairstyle frequently appears in Pinterest inspiration collections because it photographs well and complements both minimalist style outfits and more decorative dresses.
To create loose Hollywood waves, begin by dividing dry hair into several horizontal sections. Using a large barrel curling iron, curl each section away from the face while keeping the iron vertical. After curling all sections, allow the curls to cool completely. This step helps the hair maintain its structure once brushed.
Next, gently brush through the curls using a soft hairbrush to transform them into smooth waves. Lightly shape the waves with your fingers to guide them into a consistent direction. A small amount of styling spray helps hold the wave pattern in place without stiffening the hair. If additional structure is needed, a few hidden hair pins can guide the waves into a balanced form. The final result should appear smooth, flowing, and evenly shaped along the full length of the hair.

Idea 2: Elegant Braided Crown
How to Create
The braided crown hairstyle creates a structured frame around the head by wrapping braids across the top of the hairline. This design is inspired by traditional braided techniques but adapted for modern formal events. The style produces a balanced shape that keeps hair controlled while allowing the remaining length to flow naturally down the back or shoulders. Because the braid sits near the crown of the head, it draws attention upward and creates visual interest without overwhelming the overall hairstyle.
This style is popular in Pinterest creative ideas boards because it blends classic braiding with contemporary formal styling. The braided crown also works well for individuals who want a hairstyle that remains secure throughout the event. By anchoring the braid along the head, the structure remains stable while still appearing soft and elegant. The contrast between the structured braid and loose hair sections adds depth and texture to the hairstyle.
To create this hairstyle, begin by parting the hair down the middle or slightly to one side. Separate a section near the front hairline and begin creating a traditional three strand braid along the edge of the head. Gradually incorporate additional hair into the braid as you move toward the back of the head, similar to a crown braid technique.
Continue braiding until the braid reaches the opposite side of the head. Secure the end using a small elastic band. The braid can then be wrapped across the crown and pinned in place using bobby pins hidden beneath the hair. The remaining length of hair can be softly curled or left smooth depending on the desired finish. This hairstyle combines organization, structure, and visual detail while remaining achievable for beginners practicing basic braiding methods.

Idea 3: Twisted Low Bun
How to Create
The twisted low bun is a formal hairstyle designed to sit at the base of the neck. This placement creates a balanced silhouette that complements long dresses and formal necklines. Unlike tightly structured buns, this style relies on soft twists and gentle volume to create a relaxed but elegant appearance. The twisted structure adds texture while keeping the overall hairstyle neat and controlled.
This hairstyle frequently appears among Pinterest trending ideas because it is both practical and visually refined. Long hair naturally provides enough length to form smooth twists and layered folds within the bun. The design also keeps hair away from the face and shoulders, which many people prefer when wearing detailed or decorative dresses. The twisted low bun works well for individuals seeking a hairstyle that remains secure while maintaining a sophisticated aesthetic.
To begin, brush the hair thoroughly and gather it into a low ponytail at the base of the neck. Secure the ponytail with an elastic band. Divide the ponytail into two or three sections and twist each section individually. Twisting the sections adds structure and texture to the final bun.
Once the sections are twisted, wrap them around the base of the ponytail to form a circular bun shape. Use hair pins to secure each section in place as you wrap them. Adjust the twists slightly to create a balanced shape and prevent gaps in the bun. Light styling spray can be applied to hold the structure in place. The finished style should appear smooth, structured, and evenly balanced across the back of the head.

Idea 4: Half-Up Braided Waterfall Style
How to Create
The waterfall braid hairstyle is designed to create a cascading pattern where strands of hair flow through the braid while continuing downward. This technique produces a layered appearance that highlights the natural length of the hair. The half-up structure allows the braid to act as a decorative element while the remaining hair remains loose. This balance between structure and softness makes the style visually interesting while still suitable for formal occasions.
On Pinterest inspiration boards, waterfall braids are often categorized as beginner friendly creative projects because they combine simple braiding with elegant results. The technique may appear complex at first glance, but it becomes manageable when broken down into clear steps. The waterfall braid is particularly effective for long hair because the flowing strands create a visible cascading effect that shorter hair cannot achieve as easily.
To create the hairstyle, begin by taking a section of hair near the front hairline. Divide this section into three strands and begin braiding across the back of the head. After each braid cycle, release the lower strand and allow it to fall downward while introducing a new strand from above. This creates the waterfall effect where hair flows through the braid.
Continue this process across the back of the head until reaching the opposite side. Secure the braid using a small elastic or hidden hair pin. The remaining hair can be curled with a large curling iron to add texture and volume. The finished hairstyle displays a delicate braided structure above flowing curls, creating a balanced formal look.

Idea 5: High Textured Ponytail
How to Create
A high textured ponytail transforms a simple hairstyle into a formal statement by adding volume, curls, and controlled height. This style begins with a high ponytail placement near the crown of the head. The elevated position lengthens the silhouette and highlights the full length of the hair. Texture is created through curling or layering the ponytail sections, which adds movement and depth.
Pinterest hairstyle collections often include textured ponytails because they are practical yet visually dynamic. The style works well for long hair since the ponytail length allows curls and waves to cascade downward dramatically. Unlike traditional ponytails, this version incorporates structured volume at the crown and controlled texture throughout the ponytail.
To create the style, begin by gently teasing the hair at the crown to create subtle lift. Gather the hair into a high ponytail and secure it firmly with an elastic band. Wrap a small section of hair around the base of the ponytail to conceal the elastic and secure it with a pin.
Next, curl the ponytail sections using a medium or large curling iron. This adds texture and movement throughout the length of the hair. Once curled, gently separate the curls with your fingers to create a fuller appearance. Light styling spray can help maintain the volume and structure. The finished ponytail should appear elevated, balanced, and full of movement.

Idea 6: Romantic Side Sweep Curls
How to Create
The romantic side sweep hairstyle shifts the majority of the hair to one side of the head. This asymmetrical arrangement creates visual drama while still appearing soft and elegant. The curls add texture, while the side placement allows the hair to flow smoothly over one shoulder. The result is a hairstyle that highlights facial features while maintaining a graceful silhouette.
This hairstyle frequently appears in Pinterest aesthetic hairstyle collections because it works well with both classic and modern prom dresses. Long hair enhances the side sweep effect since the curls have enough length to cascade smoothly across the shoulder and chest area. The design also allows accessories or earrings on the opposite side to remain visible.
To achieve the style, begin by creating loose curls throughout the hair using a curling iron. Allow the curls to cool before gently separating them with your fingers. Next, create a deep side part to guide the direction of the hairstyle.
Gather the curls toward one side of the head and secure them lightly at the back using hidden pins. This keeps the hair positioned on one shoulder while maintaining a natural appearance. Light styling spray can be used to keep the curls defined while preventing stiffness. The result is a soft, flowing hairstyle that emphasizes length and movement.

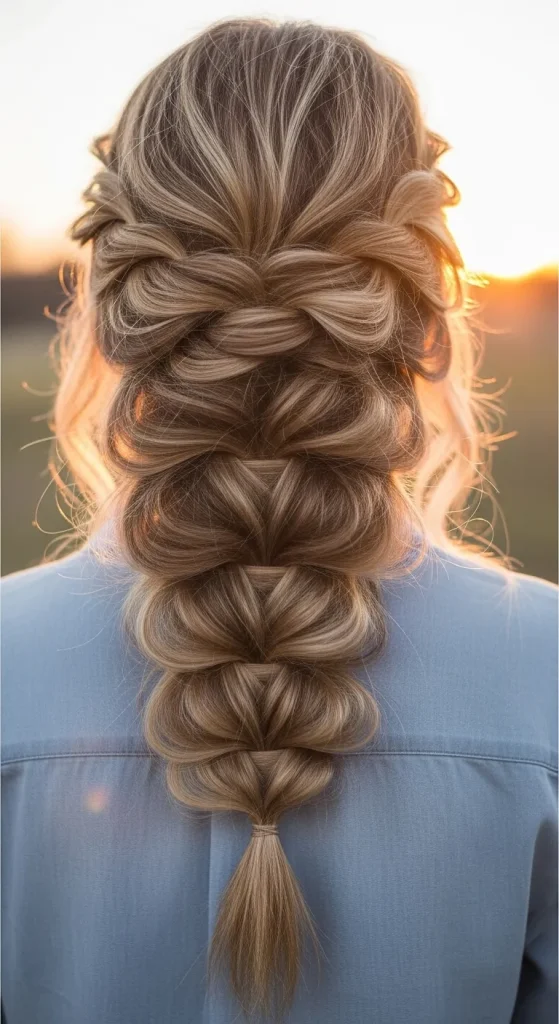
Idea 7: Bohemian Loose Braided Style
How to Create
The bohemian loose braid hairstyle focuses on relaxed braiding combined with soft waves. This style intentionally avoids tight structure in favor of a slightly undone appearance that still feels elegant and balanced. The braid is typically created using a thicker section of hair and gently loosened to create volume.
This hairstyle is popular in Pinterest creative inspiration boards because it reflects modern minimalist style trends. The relaxed braid texture pairs well with flowing dresses and natural makeup styles. Long hair is ideal for this look because the braid can extend significantly down the back while maintaining fullness.
To create the style, begin by curling the hair lightly to add texture. Gather the hair at the back and divide it into three large sections. Braid the hair loosely down the length while maintaining consistent tension.
Once the braid is secured with an elastic band, gently pull small sections outward to create volume. This technique, often called braid pancaking, expands the braid and creates a softer appearance. The finished braid should look full, relaxed, and naturally textured.
Idea 8: Sleek Straight Formal Look
How to Create
The sleek straight hairstyle emphasizes smoothness, shine, and controlled alignment. Unlike textured styles, this hairstyle focuses on precision and minimalism. Long hair is particularly suited to this style because the length enhances the flowing vertical lines created by straight hair.
Minimalist hairstyles frequently appear in Pinterest modern design boards because they complement structured clothing and formal accessories. A sleek hairstyle highlights facial features and produces a clean aesthetic suitable for formal photography.
To create the style, begin by applying heat protection and straightening the hair in small sections using a flat iron. Work slowly to ensure each section becomes smooth and evenly aligned.
Once the entire head of hair is straightened, brush it gently to blend the sections. A small amount of shine spray or lightweight styling product can help enhance smoothness. The finished hairstyle should appear polished, straight, and evenly balanced along the full length of the hair.

Idea 9: Double Twist Half-Up Style
How to Create
The double twist half-up hairstyle combines twisting techniques with loose hair sections. Two twisted strands from each side of the head meet at the back, creating a structured focal point. The remaining hair remains loose, providing balance between structure and movement.
This hairstyle appears frequently among beginner friendly Pinterest ideas because twisting hair is simpler than complex braiding techniques. Despite its simplicity, the final result appears refined and suitable for formal events.
To begin, take a section of hair from one side of the head and twist it toward the back. Repeat the same process on the opposite side. Bring both twists together at the back of the head and secure them with a small elastic or hidden pin.
The remaining hair can be curled lightly to add texture. Adjust the twists slightly to ensure symmetry and balance. The finished style should feature two clean twists meeting at the center while the rest of the hair flows freely.

Idea 10: Soft Layered Curl Volume Style
How to Create
The soft layered curl hairstyle focuses on creating volume throughout the entire length of the hair. Instead of concentrating curls in one area, this technique distributes waves and curls evenly from top to bottom. The result is a full, balanced hairstyle with noticeable texture and movement.
This style appears often in Pinterest inspiration boards because it highlights the natural beauty of long hair. The layered curls create visual depth, which works well for formal photographs and stage lighting during events like prom.
To create the style, begin by dividing the hair into several sections. Curl each section using a medium barrel curling iron. Alternate the direction of the curls to create a natural layered effect.
After curling all sections, gently separate the curls with your fingers. Avoid brushing too heavily, as this may remove definition. Light styling spray can help maintain the volume while keeping the hair flexible. The final result should appear full, soft, and evenly textured.

Common Beginner Mistakes and How to Avoid Them
Many beginners encounter challenges when creating formal hairstyles because they underestimate the importance of preparation and structure. One common mistake involves attempting complex hairstyles without properly sectioning the hair. Without clear sections, braids, curls, or twists can become uneven and difficult to control. Proper sectioning allows the hairstyle to develop in an organized and balanced manner. Another frequent issue is applying heat styling tools too quickly. When curls are created too rapidly or with inconsistent heat, the texture may become uneven. Taking time to curl each section carefully ensures consistent results.
Another mistake involves overusing styling products. While hairspray and volumizing products help maintain structure, excessive amounts can make hair appear stiff or heavy. Using moderate amounts helps maintain flexibility while still supporting the hairstyle’s shape. Beginners also sometimes skip the cooling phase after curling. Allowing curls to cool before brushing or shaping them helps preserve their structure. Planning the hairstyle in advance and practicing the technique beforehand significantly reduces these problems and helps create a smoother final result.
Practical Tips for Better Results
Improving hairstyling results often depends on careful preparation and patience. One useful tip is to practice the hairstyle several days before the event. Practicing helps identify areas where adjustments may be needed and builds confidence when recreating the style later. Another helpful technique involves using mirrors placed at different angles. Multiple mirrors allow better visibility when styling the back of the head, which improves accuracy and symmetry.
Hair texture also plays an important role in styling success. Slightly textured hair often holds braids and curls more effectively than extremely smooth hair. If necessary, light texturizing spray can help create grip without weighing the hair down. When working with long hair, dividing it into smaller sections also makes styling more manageable. Smaller sections allow greater precision when curling or braiding.
Maintaining balance is another important factor. Formal hairstyles usually rely on symmetry or intentional asymmetry. Taking time to check the hairstyle from multiple angles helps ensure the final appearance remains balanced and polished.
Styling, Presentation, or Organization Ideas
Presentation plays an important role in enhancing the visual impact of prom hairstyles. Once the hairstyle is completed, small adjustments can improve its overall balance and structure. One effective approach involves gently loosening specific sections of braids or curls to create natural volume. This technique prevents the hairstyle from appearing overly tight or rigid while maintaining its form.
Hair accessories can also enhance the overall design when used carefully. Simple decorative pins, subtle hair combs, or small floral accents can add visual detail without overwhelming the hairstyle. When incorporating accessories, placement should complement the hairstyle’s structure rather than distract from it.
Lighting and photography considerations are also useful when planning a prom hairstyle. Styles with visible texture, such as curls or braids, often photograph well because they create depth and dimension. Ensuring that the hairstyle frames the face naturally helps produce balanced photographs. Organizing the hair so it flows smoothly with the neckline and shoulders of the dress also improves the overall presentation.
Budget or Time Planning
Effective planning allows prom hairstyles to be created efficiently without requiring expensive salon appointments. Many hairstyles described in this guide rely on basic tools that are commonly available at home. Curling irons, hair elastics, and bobby pins are inexpensive materials that can support a wide range of formal hairstyles. Planning ahead helps avoid last minute preparation challenges.
Time management is equally important. Complex hairstyles involving braids or curls may require up to one hour for beginners. Starting the styling process early allows time for careful adjustments and corrections. Preparing the materials and tools before beginning the hairstyle helps maintain a smooth workflow.
Practicing the hairstyle in advance also saves time during the final preparation. Once the technique becomes familiar, the styling process becomes significantly faster. With organized planning, many formal hairstyles can be completed efficiently while still achieving a polished and elegant result.
Creative Expansion and Advanced Inspiration
Once basic prom hairstyles become comfortable to create, they can be expanded through creative experimentation. Combining techniques such as braiding and curling often produces more complex hairstyles. For example, a braided crown can be paired with layered curls to create additional texture and depth. Similarly, twisted buns can be combined with decorative braids for a more intricate design.
Advanced inspiration often involves experimenting with placement and structure. Hairstyles can shift from centered designs to asymmetrical arrangements that create visual interest. Exploring different braid patterns or varying curl sizes can also change the overall appearance of the hairstyle.
Pinterest inspiration boards often feature creative combinations that build upon simple foundational techniques. By mastering basic curls, braids, and twists, individuals gain the flexibility to develop unique hairstyles suited to their personal style. With practice and creativity, these techniques can evolve into more detailed and visually dynamic formal hairstyles suitable for many special occasions.