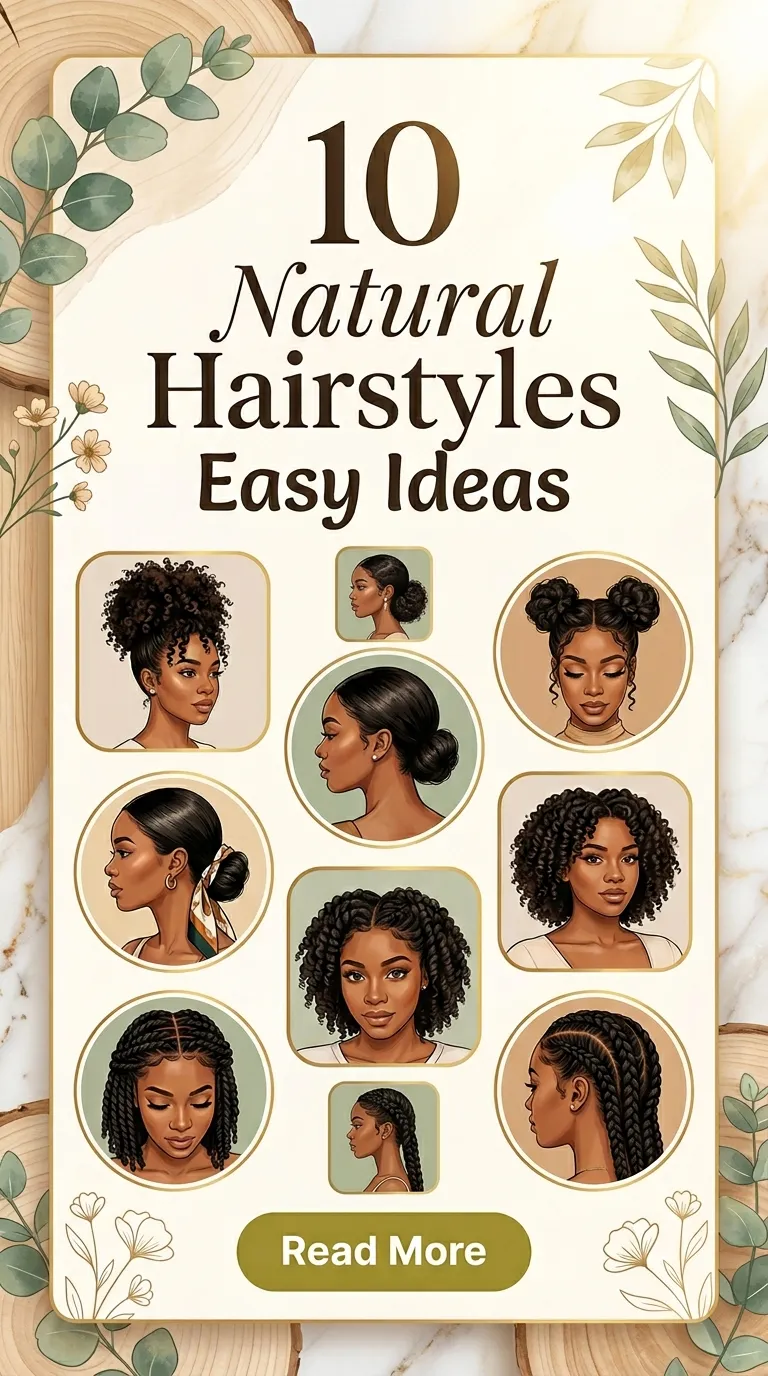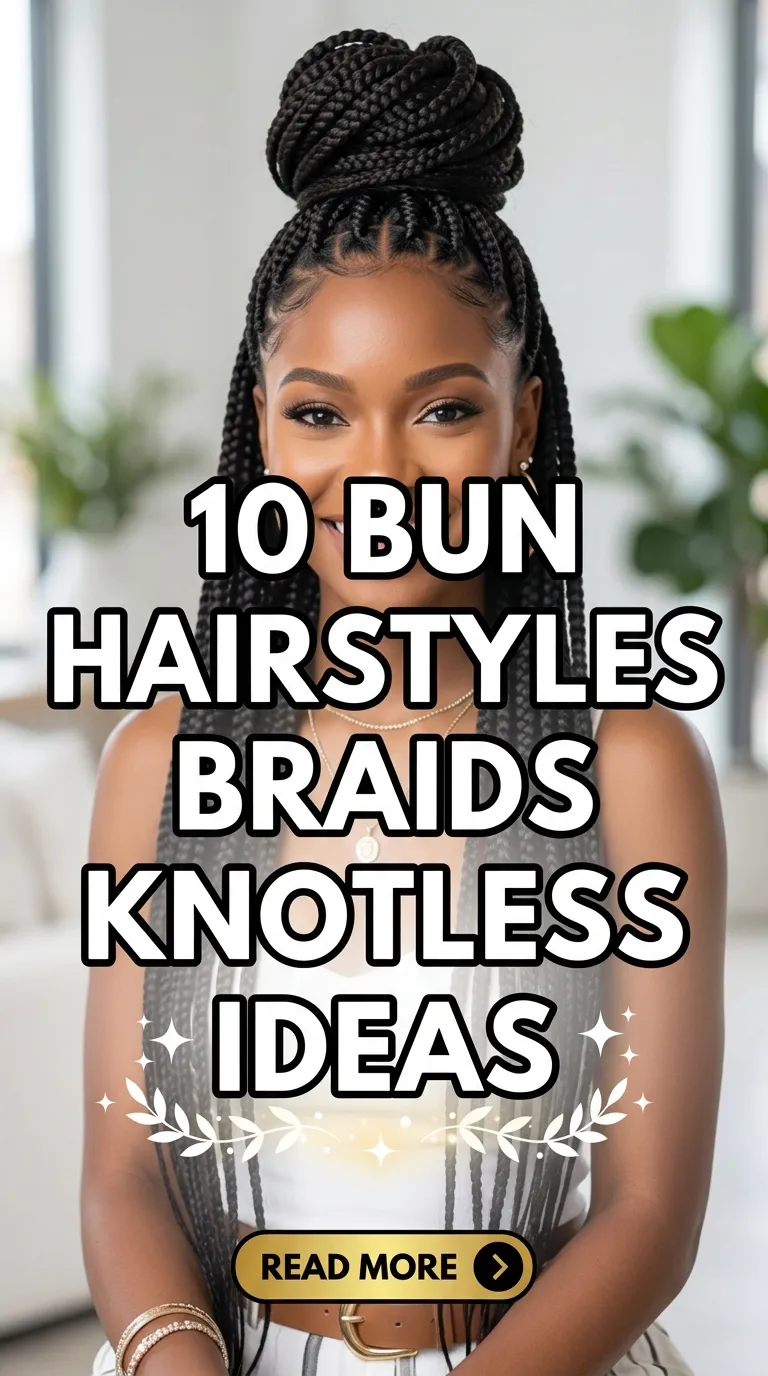
10 Bun Hairstyles Braids Knotless Ideas

Introduction
Bun hairstyles combined with knotless braids are widely shared across Pinterest boards because they combine protective styling, visual structure, and versatile design. These hairstyles allow braided sections to be shaped into elegant buns while maintaining the lightweight tension of knotless braiding techniques. Knotless braids are created by gradually feeding hair into the braid rather than tying a knot at the scalp. This method distributes tension more evenly and produces a natural-looking base that blends smoothly with styled updos. When these braids are gathered into buns, the result is a clean, sculpted hairstyle that works well for casual wear, events, work settings, and protective hair care routines.
This article explores ten practical bun hairstyle ideas built specifically around knotless braids. Each concept explains the design structure and the practical process required to create the look. Readers will learn how to arrange braids, secure buns, control volume, and maintain symmetry. The ideas focus on beginner friendly styling methods that can be recreated with simple tools and clear planning. These Pinterest ideas offer creative inspiration for anyone interested in braids, structured updos, and modern braided aesthetics while maintaining comfort and scalp health.
Why This Idea Is Trending or Useful
Bun hairstyles made from knotless braids are frequently saved as Pinterest inspiration because they combine function with visual design. Many people look for hairstyles that protect natural hair while still offering styling variety. Knotless braids meet this need by reducing scalp tension compared with traditional braids. When these braids are gathered into buns, they create a structured look that can be adjusted in height, size, and shape.
Another reason these styles are trending is their flexibility. A bun created from braids can appear minimalist, sculptural, romantic, or modern depending on how the braids are arranged. Pinterest users often search for creative ideas that can transition between everyday wear and special occasions. Braided buns satisfy this requirement because they can be styled quickly once the braids are installed.
These hairstyles also attract beginners because the final bun formation does not require advanced hairstyling techniques. With basic planning, hair ties, and pins, braids can be wrapped, coiled, or stacked into a balanced bun. This combination of DIY accessibility and polished appearance makes braided bun styles popular across home decor–style inspiration boards, fashion planning content, and step by step hairstyle tutorials.
Materials and Preparation
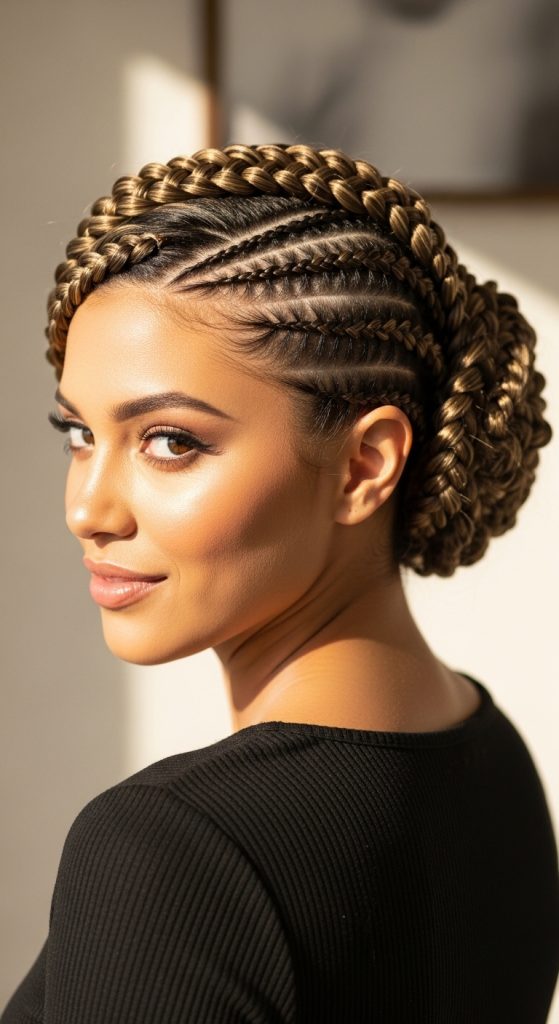
Creating bun hairstyles with knotless braids requires simple materials and careful preparation. The process begins with clean, detangled hair. Hair should be washed, conditioned, and thoroughly dried before braiding. A wide-tooth comb helps remove tangles and prepare sections. Sectioning clips are useful for organizing the hair before braiding begins. Many people prefer using a rat-tail comb to create straight parts that maintain a neat scalp appearance once the braids are installed.
Moisturizing cream or lightweight oil can be applied before braiding to reduce friction and maintain scalp comfort. If hair extensions are used for longer braids, they should be prepared and separated before the braiding process begins. The knotless technique involves gradually feeding these extensions into the braid to maintain a smooth base.
After braids are completed, bun styling requires additional tools. Hair ties help gather braids into a ponytail foundation. Bobby pins or large hair pins secure the bun shape. Edge brushes or small combs help smooth the hairline if desired. Planning is important before beginning the bun design. Deciding bun placement, height, and braid direction helps ensure that the finished hairstyle looks balanced and visually structured.
MAIN IDEAS
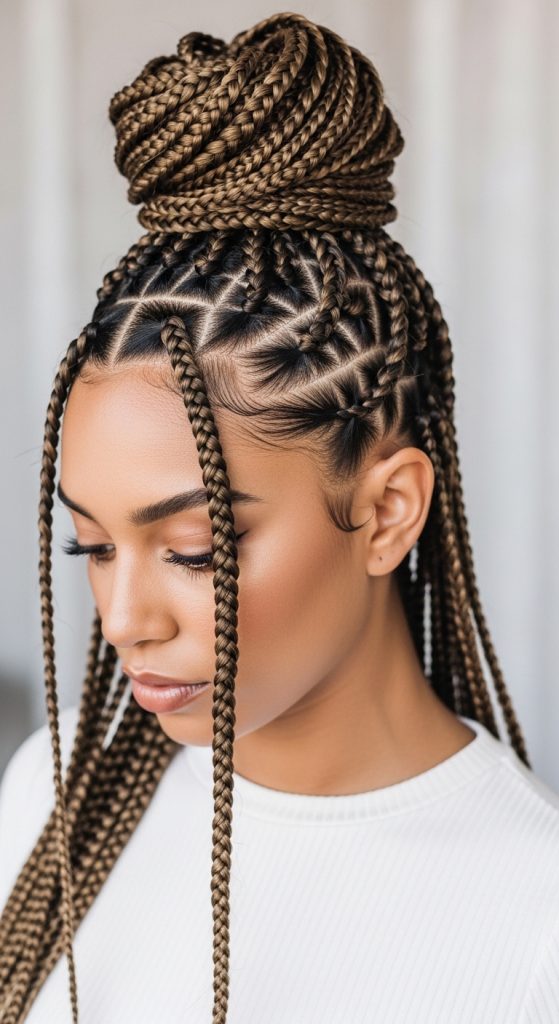
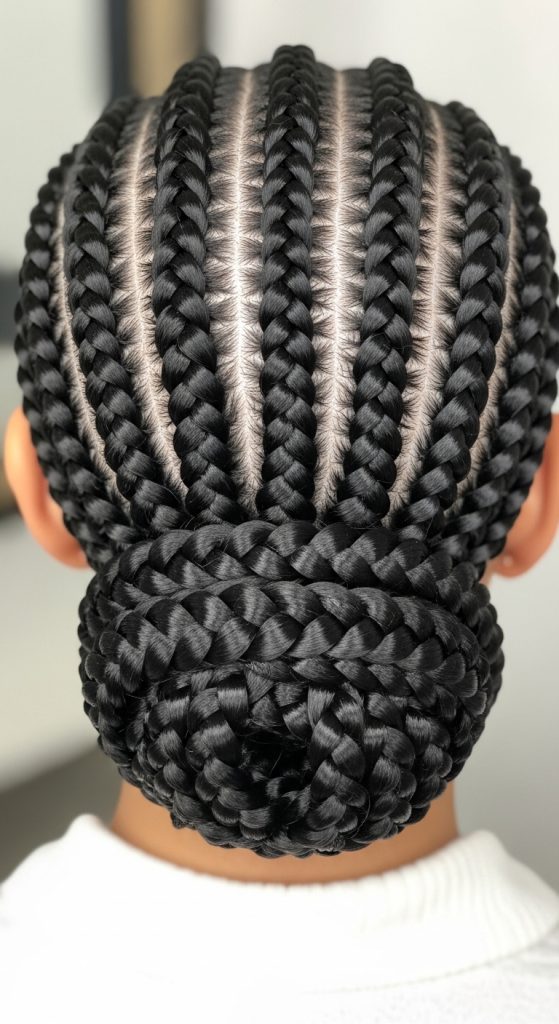
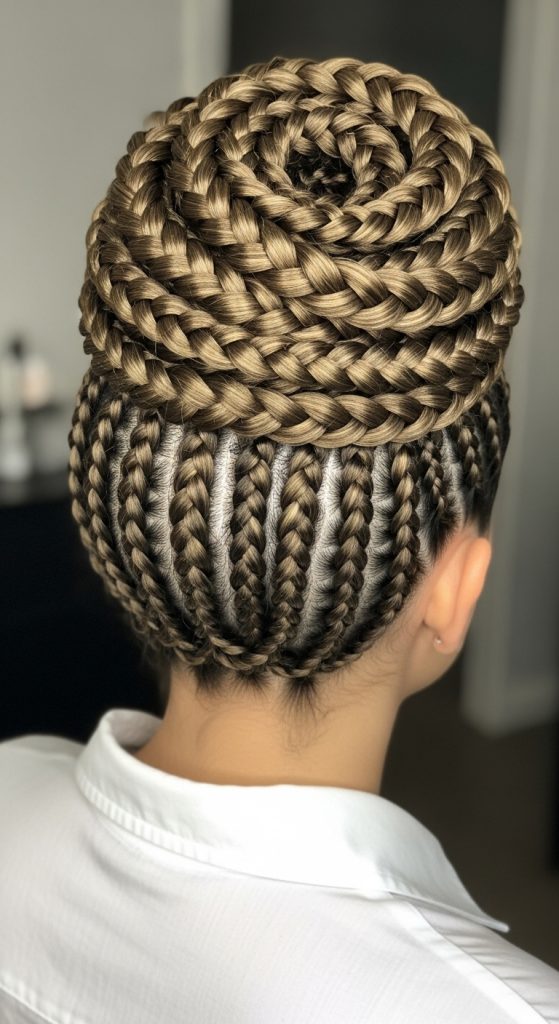
Idea 1: High Crown Knotless Braided Bun
How to Create
A high crown braided bun creates a strong vertical silhouette that highlights the structure of knotless braids. In this design, braids are gathered at the top center of the head to form a rounded bun positioned slightly forward on the crown. This placement draws attention upward and creates a balanced shape that works well with long or medium-length braids. The clean scalp appearance produced by knotless braids allows the parts and braid pattern to remain visible even after the bun is formed.
This hairstyle is popular in Pinterest ideas because it combines a sculptural bun shape with minimal styling effort. The braids themselves provide texture, so the bun naturally appears detailed without additional decoration. The style works well with symmetrical parting patterns such as square parts or triangle parts. The result is a hairstyle that looks organized and structured while remaining practical for everyday wear. This makes it a reliable creative project for those interested in braided updos that maintain a modern design aesthetic.
To create this look, start by gathering all knotless braids into a high ponytail at the crown of the head. Secure the ponytail with a strong hair tie to establish the bun base. Once the ponytail is secured, divide the braids into two or three sections depending on thickness. Begin wrapping each section around the base of the ponytail in a circular motion.
Continue wrapping the braids while guiding them into a compact coil. Use large bobby pins to secure the braids at multiple points so the bun remains stable. The goal is to distribute the braids evenly so the bun appears balanced from all sides. Adjust the outer braids slightly to smooth the shape. The finished bun should appear rounded and centered at the crown, creating a clean and elevated braided bun hairstyle.
Idea 2: Low Elegant Knotless Braided Bun
Step-by-Step Guide
The low braided bun is a structured yet understated hairstyle that places the bun at the nape of the neck. This design produces a soft and elegant silhouette that works well for formal environments or everyday wear. The low placement allows the braid pattern to remain visible across the scalp while the bun rests comfortably against the lower hairline.
This idea frequently appears in Pinterest inspiration boards because it combines simplicity with polished styling. The bun sits in a natural resting position, which reduces tension and makes the hairstyle comfortable for long periods. The look also works well with longer braids because the extra length allows the bun to appear fuller and more defined.
The low bun also complements minimalist style aesthetics. Instead of a dramatic height or large volume, the hairstyle focuses on smooth braid arrangement and neat wrapping techniques. The result is a refined braided updo that remains visually interesting without appearing overly complex.
To create this hairstyle, begin by brushing the braids gently backward toward the nape of the neck. Gather them into a low ponytail and secure with a strong elastic band. Once the base is secure, separate the ponytail into two sections.
Twist each section loosely before wrapping it around the ponytail base. Continue wrapping until the bun forms a compact circular shape. Insert bobby pins underneath the wrapped braids to lock them into position. Adjust the outer braids so they lie smoothly against the bun structure. The final look should appear centered and symmetrical with a soft rounded shape resting at the base of the neck.
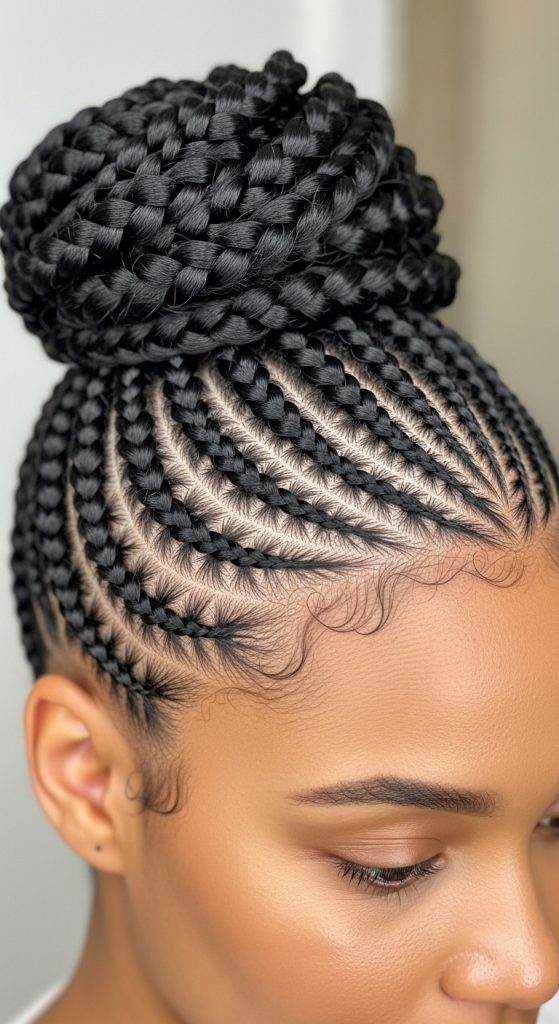
Idea 3: Braided Top Knot Bun
How to Make
The braided top knot bun is a bold hairstyle that emphasizes height and compact structure. Unlike traditional buns that sit slightly behind the crown, this design places the bun directly at the highest point of the head. The result is a strong vertical shape that highlights the braided texture.
This style is frequently saved in Pinterest creative ideas collections because it combines a modern design with clear visual balance. Knotless braids allow the scalp sections to remain smooth while the bun becomes the main focal point. The top knot bun works particularly well for long braids because it allows the hair to wrap multiple times around the bun base.
The hairstyle is also practical for daily activities. Because the bun sits high on the head, it keeps braids away from the neck and shoulders. This makes the design comfortable for warm weather or active schedules. The sculptural appearance of the bun also creates a polished finish without requiring complicated styling techniques.
To create the braided top knot bun, gather all braids upward toward the top center of the head. Secure them with a durable hair tie. Once the ponytail is formed, divide the braids into several smaller groups. Begin wrapping one group around the base of the ponytail to create the core of the bun.
Continue wrapping additional braid groups around the center coil. Each layer should overlap slightly to build a round structure. Use hair pins to secure the braids beneath the bun so they remain hidden. Adjust the braids evenly so the bun maintains a symmetrical appearance. The finished bun should appear compact, centered, and elevated at the top of the head.

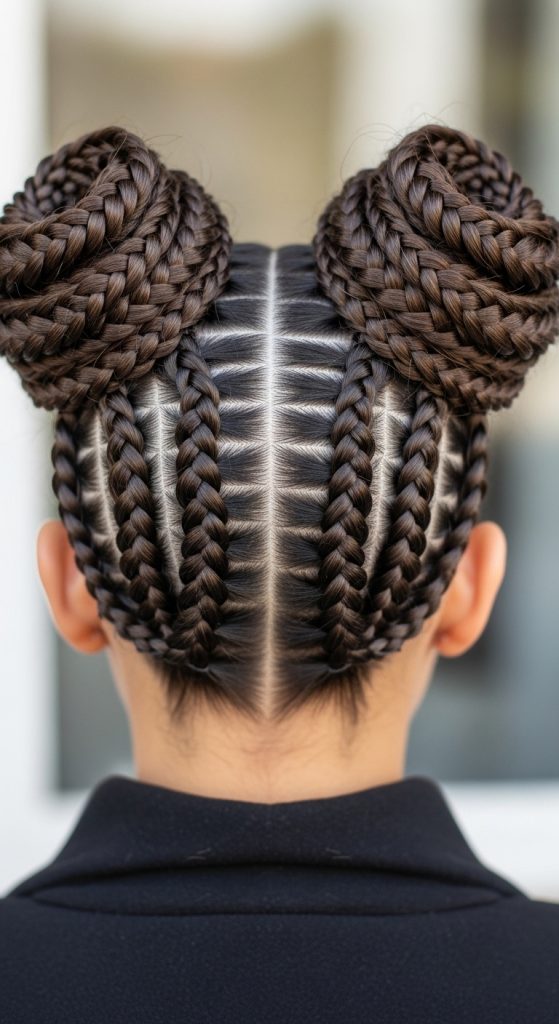
Idea 4: Double Braided Bun Style
Execution Process
The double braided bun style divides knotless braids into two sections to create a pair of buns instead of a single one. This design introduces visual balance and symmetry. Each bun sits on one side of the head, producing a playful yet organized hairstyle that works well with evenly parted braids.
Pinterest boards often feature this style because it adds variety to traditional bun hairstyles. Instead of concentrating all braids into one structure, the double bun distributes volume across two points. This creates an interesting silhouette while still maintaining the practicality of a braided updo.
This hairstyle also works well for medium-length braids because each bun requires less wrapping length. The balanced placement of the buns ensures that the hairstyle appears intentional and structured. The design can be adapted by adjusting bun height or spacing to suit different face shapes and braid lengths.
To create double braided buns, begin by parting the braids down the middle from the forehead to the back of the head. Gather the braids on the left side into a ponytail and secure with an elastic band. Repeat the same step on the right side.
Next, twist the braids from the first ponytail and wrap them around the base to create a bun. Secure the shape using several bobby pins. Repeat the same process on the opposite side. Adjust both buns so they appear even in size and position. The finished style should feature two symmetrical braided buns positioned evenly on both sides of the head.
Idea 5: Twisted Knotless Braided Bun
How to Create
The twisted braided bun introduces an additional texture element by twisting braid sections before forming the bun. This technique changes the visual pattern of the bun surface and produces a layered appearance. Instead of smooth wrapping, the twisted sections create a spiral texture.
This hairstyle appears frequently in Pinterest tutorials because it adds depth to a simple bun without requiring advanced styling skills. The twist technique works well with knotless braids because their smooth base allows the twists to remain visible. The design also creates a slightly larger bun since the twisted braids occupy more space.
The twisted bun style works particularly well with longer braids. The extra length allows the twisted sections to wrap multiple times around the bun base. The result is a textured bun that maintains a neat and balanced shape while highlighting the braided structure.
To create the twisted braided bun, gather all braids into a high or mid-height ponytail depending on preference. Secure the ponytail with a strong hair tie. Divide the ponytail into several sections.
Twist each section firmly from root to tip. Once twisted, wrap the first section around the ponytail base and secure with pins. Continue wrapping the remaining twisted sections around the bun core. Arrange the twists so they form an even spiral around the center. Use additional pins to stabilize the bun. The finished result should display visible twist patterns across the surface of the bun.
Idea 6: Side-Swept Braided Bun
Setup Method
The side-swept braided bun shifts the bun position away from the center of the head and places it slightly behind one ear. This design creates an asymmetrical hairstyle that highlights the natural direction of the braids. The bun becomes the focal point while the scalp pattern remains visible on the opposite side.
This style appears often in Pinterest aesthetic collections because it creates a softer and more relaxed look compared with centered buns. The off-center placement adds movement and visual variety to the hairstyle. It also works well with diagonal braid patterns.
Side-swept buns are practical for events and gatherings because they frame the face while keeping braids secured. The hairstyle balances structure and casual styling, making it suitable for both everyday use and special occasions.
To create this bun, gently gather all braids toward one side of the head near the back. Secure them into a side ponytail behind the ear. Once secured, divide the ponytail into two or three groups.
Wrap the first group around the ponytail base to form the bun core. Continue wrapping the remaining braids around the structure. Use bobby pins to secure the shape. Adjust the bun so it sits comfortably behind the ear while maintaining a rounded form.
Idea 7: Braided Spiral Bun
How to Make
The braided spiral bun focuses on creating a visible spiral pattern across the bun surface. This design emphasizes the direction of braid wrapping so the bun appears like a circular coil. The spiral structure highlights the texture of knotless braids.
Pinterest inspiration boards often feature spiral buns because they appear intricate while remaining simple to create. The key design element is guiding braids consistently in one circular direction. This method creates a layered visual pattern.
The spiral bun works well for long braids because the additional length allows the spiral structure to expand outward. The finished bun appears structured, balanced, and visually detailed.
To create this look, gather braids into a high or mid-height ponytail. Secure with an elastic band. Select one braid to start the spiral core. Wrap it tightly around the base.
Continue wrapping additional braids around the center in the same circular direction. Use pins to secure each layer as the spiral expands. Adjust the outer braids so they maintain a smooth circular flow.

Idea 8: Half-Up Braided Bun
Step-by-Step Guide
The half-up braided bun combines loose braids with a smaller bun at the crown. Instead of gathering all braids into one structure, only the top section is styled into a bun. The remaining braids fall naturally down the back.
This hairstyle is widely shared as Pinterest inspiration because it balances structure with movement. The bun provides visual focus while the loose braids maintain length and texture. This combination works well for casual styling and everyday wear.
The half-up bun also allows beginners to experiment with bun styling without needing to wrap all braids. The smaller bun size simplifies the process while still producing a polished look.
To create this hairstyle, separate the braids from the top section of the head. Gather them into a ponytail at the crown. Secure with an elastic band.
Wrap the selected braids around the ponytail base to create a compact bun. Secure with pins. Leave the remaining braids loose and adjust them so they fall evenly down the back.

Idea 9: Braided Crown Bun
Execution Process
The braided crown bun positions the bun slightly behind the crown so the scalp pattern forms a visible frame around it. This design creates a balanced structure where the bun appears centered within the braid layout.
Pinterest trending ideas often feature crown buns because they highlight both the braid pattern and the bun structure. The hairstyle maintains a symmetrical appearance while still offering a strong visual focal point.
This style works particularly well with evenly spaced braids because the uniform sections create a clean frame around the bun.
To create the crown bun, gather braids into a ponytail positioned slightly behind the crown. Secure with a strong hair tie.
Wrap the braids around the ponytail base while maintaining a circular pattern. Use pins to hold the bun firmly. Adjust the bun so it appears centered within the braid arrangement.

Idea 10: Large Statement Braided Bun
How to Create
The large statement bun emphasizes volume and size. Instead of forming a compact bun, the braids are arranged to create a wide, full structure. This design turns the bun into the main decorative element of the hairstyle.
Pinterest creative ideas often feature statement buns because they produce dramatic visual impact while still using simple styling techniques. The volume created by multiple braid layers forms a bold hairstyle that stands out.
The statement bun works best with long braids because the extra length allows the bun to expand outward.
To create this bun, gather all braids into a high ponytail. Secure with a strong elastic band.
Wrap the braids loosely around the ponytail base to create a larger circular shape. Spread the braids evenly while pinning them in place. Continue layering until the bun reaches the desired size.
Common Beginner Mistakes and How to Avoid Them
One common mistake when creating braided buns is placing the ponytail base incorrectly. If the base is too loose or positioned unevenly, the bun may tilt or appear unbalanced. Planning the bun position before gathering the braids helps maintain symmetry. Another frequent issue is using too few hair pins. Braided buns contain more weight than loose hair buns, so additional pins are necessary to stabilize the structure.
Some beginners wrap braids too tightly around the bun base. This can cause the bun to appear narrow or uneven. Wrapping the braids with moderate tension helps maintain a rounded shape. Another mistake is ignoring braid direction. When braids are wrapped randomly, the bun loses its visual structure. Guiding braids consistently in one direction improves the overall design.
Practical Tips for Better Results
Better results often come from careful braid arrangement rather than complicated styling techniques. Dividing braids into sections before wrapping helps distribute volume evenly. This prevents one side of the bun from appearing thicker than the other. Using larger hair pins designed for braided hairstyles can also improve stability.
Another useful tip is adjusting the outer braids after the bun is secured. Gently repositioning them helps smooth the shape and hide visible hair ties. Maintaining consistent wrapping direction also improves the aesthetic appearance of the bun.
Styling, Presentation, or Organization Ideas
Braided buns can be styled in ways that highlight the overall design of the hairstyle. One effective approach is arranging the braids neatly around the scalp so the parting pattern remains visible. This creates a structured frame around the bun. Edge smoothing can also enhance the finished presentation by giving the hairline a polished appearance.
Some styles look best when the bun appears centered and symmetrical. Others benefit from intentional asymmetry, such as side buns or diagonal arrangements. Organizing braids carefully before wrapping ensures the bun maintains a clean aesthetic structure.
Budget or Time Planning
Braided bun hairstyles are efficient because the braiding process occurs only once while multiple bun styles can be created afterward. Once knotless braids are installed, changing bun placement requires minimal time. Most bun styles can be completed in five to ten minutes.
Planning the hairstyle in advance helps reduce styling time. Deciding whether the bun will be high, low, or side-positioned ensures the braids are gathered correctly from the start. Using durable hair ties and reusable pins also helps maintain the bun shape throughout the day.
Creative Expansion and Advanced Inspiration
After mastering basic braided bun styles, additional variations can be explored. Multiple smaller buns, braided bun patterns, and layered bun arrangements introduce new design possibilities. Combining half-up buns with spiral wrapping techniques can also produce visually complex hairstyles.
Another creative expansion is integrating braid direction into the bun structure. For example, braids that curve toward the crown naturally guide the bun shape. Experimenting with braid thickness and bun height allows the hairstyle to evolve while maintaining the core knotless braided foundation. These creative projects allow endless variation while preserving the protective and practical benefits of braided bun hairstyles.