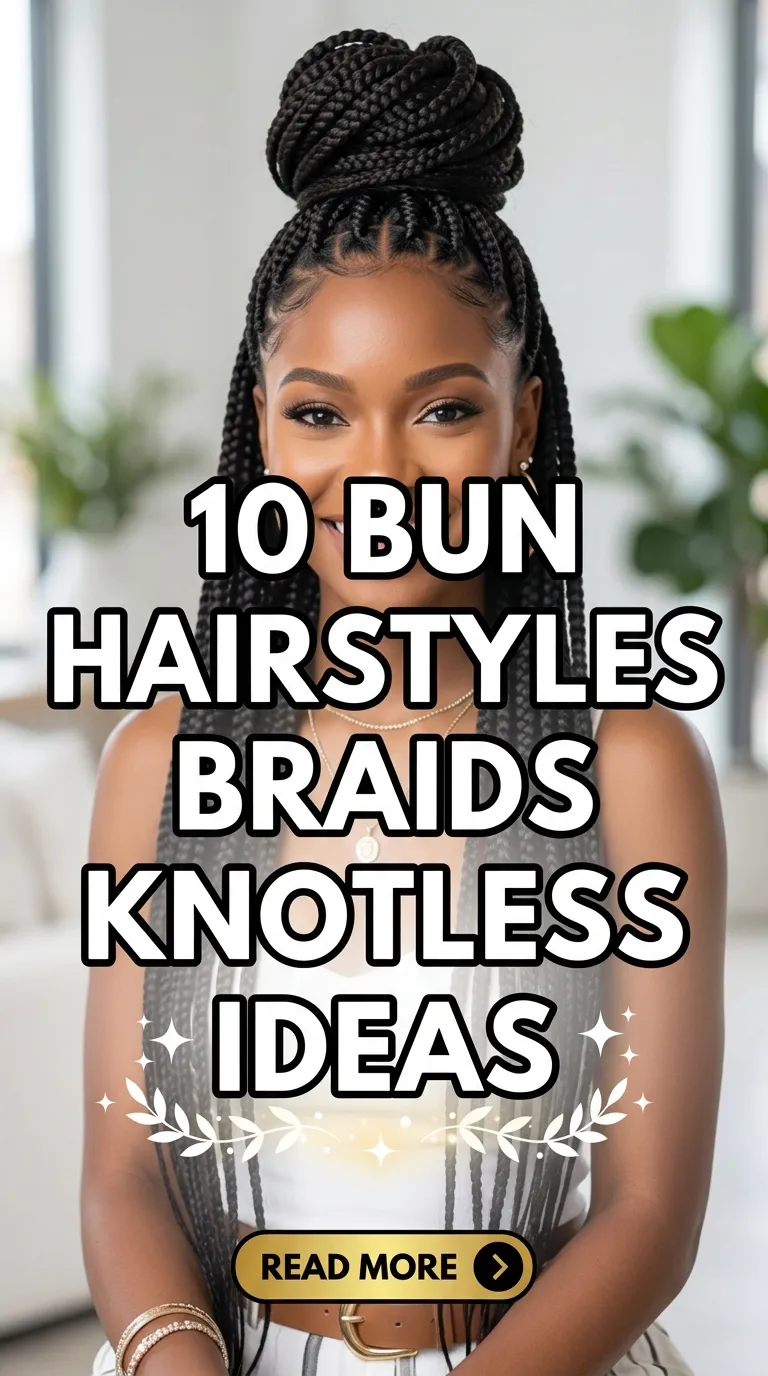
10 Prom Hairstyles Blowout Ideas

Introduction
Prom is one of the most photographed and memorable events of the school year, which makes hairstyle planning just as important as choosing a dress or accessories. Among the most popular Pinterest ideas for formal hair is the blowout hairstyle. A blowout is a styling method that uses a hair dryer, round brushes, and heat techniques to create smooth, voluminous, and polished hair. The result is hair that appears naturally full, glossy, and professionally styled without complex braiding or heavy structure. Because blowouts enhance natural hair movement, they work well with many lengths, textures, and modern design preferences.
This article presents ten detailed prom hairstyle blowout ideas designed to provide inspiration for anyone planning their prom look. Each idea includes clear explanations and practical step-by-step styling guidance so the hairstyles can be recreated at home or understood before visiting a stylist. The concepts are beginner friendly and suitable for DIY preparation with basic hair tools and simple materials. Readers will learn how to create soft waves, sleek finishes, volume-focused styles, and elegant shapes that match formal outfits. These creative ideas combine classic hair styling techniques with modern aesthetic trends often seen in Pinterest inspiration boards and formal event planning guides.
Why This Idea Is Trending or Useful
Blowout hairstyles have become widely popular in prom planning because they balance elegance, simplicity, and practicality. Many trending ideas on Pinterest highlight hairstyles that appear polished yet natural rather than heavily structured. Blowouts achieve this look by enhancing hair’s natural volume and shine while keeping the overall style lightweight and comfortable. The result works well for long evenings that include dancing, photos, and movement.
Another reason blowout styles are trending ideas in modern prom inspiration is their flexibility. The same base technique can produce multiple looks such as sleek straight hair, soft curls, layered waves, or voluminous ends. This adaptability makes blowouts compatible with many dress styles, face shapes, and aesthetic preferences including minimalist style, classic formal looks, and modern glam. Because blowouts rely on basic styling methods, they are also accessible as a DIY project for beginners who want to prepare their own prom hairstyle.
Blowouts also fit well into budget ideas for prom preparation. Instead of requiring elaborate salon treatments or complicated braiding, the technique mainly requires a hair dryer, brushes, and simple planning. This combination of accessibility, aesthetic appeal, and creative customization explains why blowout hairstyles continue to appear in trending Pinterest boards for prom inspiration.
Materials and Preparation
Preparing properly before creating a blowout hairstyle improves both the appearance and durability of the final style. Blowouts rely on clean, conditioned hair that responds well to heat styling and shaping. Begin by washing hair with a smoothing shampoo and conditioner to remove buildup and improve shine. After washing, gently towel-dry the hair to remove excess water without rough friction that may cause frizz.
Several basic tools are required for this creative project. A quality hair dryer with adjustable heat settings allows controlled airflow for shaping and smoothing. Round brushes in different sizes help create volume at the roots and shape the ends of the hair. Larger brushes produce loose waves while smaller brushes create more defined curls. Hair clips are useful for sectioning the hair during the step-by-step process. A heat protection spray is essential to shield hair from heat damage during drying and styling.
Planning also improves results. Decide whether the final blowout style will focus on volume, sleekness, waves, or curls. Sectioning the hair into manageable parts makes the tutorial process easier, especially for beginners. Working from the lower layers upward ensures consistent shaping and a smooth finish. Proper preparation ensures that each blowout idea can be recreated effectively with simple materials and organization.
Main Ideas Section
Idea 1: Classic Smooth Prom Blowout
How to Create
The classic smooth blowout is one of the most timeless prom hairstyles because it focuses on polished structure, healthy shine, and soft natural movement. This hairstyle emphasizes smooth strands that gently curve toward the ends without heavy curls or dramatic waves. It works especially well with minimalist style dresses and elegant accessories because the hairstyle complements the outfit without competing for attention. The aesthetic result is clean, balanced, and refined.
In Pinterest inspiration boards, this style is frequently associated with modern design trends that highlight natural hair texture enhanced through professional styling techniques. The classic blowout also photographs well because smooth hair reflects light evenly, which creates a glossy appearance in prom photos. This hairstyle works well with medium or long hair and can also be adapted to layered cuts.
Another advantage of the classic smooth blowout is its versatility. It can be worn with center parts, side parts, or subtle tucks behind the ear. These small variations help adapt the style to different face shapes while maintaining the polished finish expected from a formal event hairstyle.
Step-by-Step Guide
Begin by applying heat protection spray evenly through damp hair. Comb the hair gently to distribute the product and remove tangles. Divide the hair into several horizontal sections using clips. Working with smaller sections allows the brush and dryer to shape the hair evenly.
Start drying the lowest section using a medium-sized round brush. Position the dryer nozzle downward along the hair shaft to encourage smoothness and reduce frizz. Slowly pull the brush through the hair while directing warm air toward the roots and ends. This technique smooths the cuticle and creates controlled shape.
As you reach the ends of each section, gently rotate the brush inward to produce a soft curve. Repeat the same step by step process throughout all layers until the entire head is dry and smooth. For the final touch, lightly brush through the hair to blend sections together and maintain natural movement. The finished hairstyle should appear glossy, balanced, and softly curved.
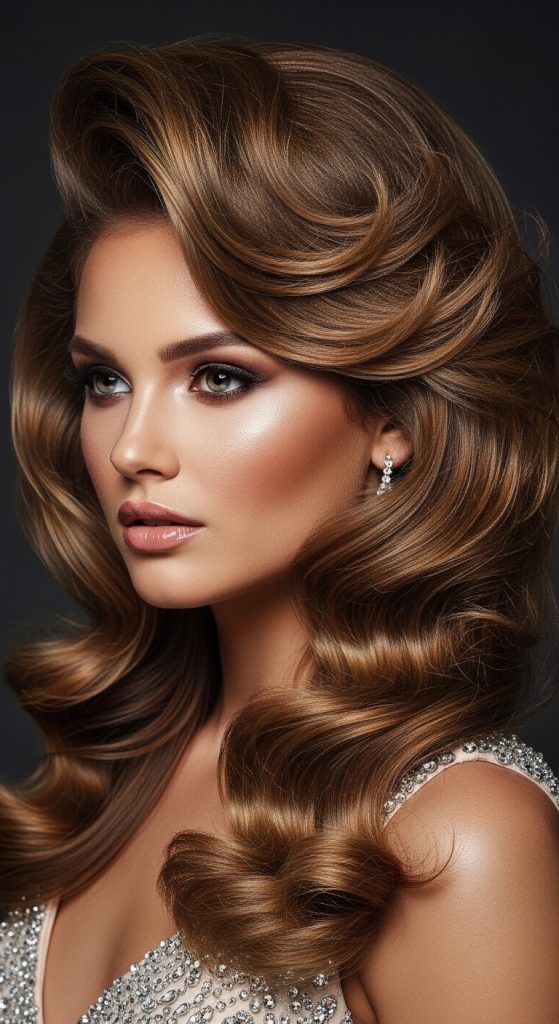
Idea 2: Voluminous Hollywood Blowout
How to Create
The voluminous Hollywood blowout is a glamorous prom hairstyle inspired by classic red carpet styling. This blowout focuses on dramatic fullness, lifted roots, and flowing waves that frame the face. It is frequently featured among Pinterest ideas for formal hairstyles because it creates a luxurious appearance while still maintaining soft movement.
The key characteristic of this style is exaggerated volume at the crown combined with smooth waves through the mid-lengths and ends. This structure creates a flattering silhouette that elongates the neck and balances formal gowns. The aesthetic often pairs well with off-shoulder dresses or elegant evening wear.
Unlike sleek blowouts that emphasize smoothness, the Hollywood blowout focuses on dimension and body. Hair appears fuller and thicker due to careful root lifting and layered shaping. This makes the hairstyle particularly effective for individuals with medium to long hair who want a more dramatic prom look while still keeping a natural texture.
Execution Process
Preparation begins with applying volumizing mousse or styling foam to damp hair. Concentrate the product near the roots to help support lift during the drying process. Use a wide comb to distribute the product evenly before beginning the blowout.
Section the hair horizontally starting from the nape of the neck. Using a large round brush, lift each section upward from the roots while directing the dryer underneath the hair. This lifting technique encourages volume rather than flattening the hair against the scalp.
Once the hair is mostly dry, wrap sections around the brush and hold briefly while applying warm air. This creates loose waves without requiring curling irons. Continue this step by step process throughout the head while focusing on building height near the crown.
After finishing all sections, gently brush through the hair to blend the waves into soft flowing movement. The result should be a full, glamorous hairstyle with noticeable volume and elegant structure suitable for formal prom photos.
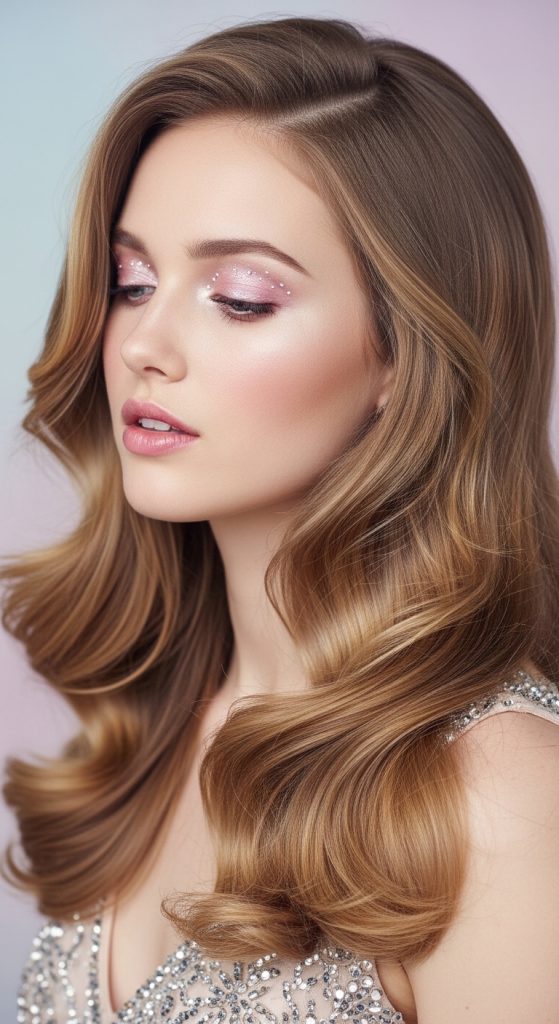
Idea 3: Soft Romantic Blowout Waves
How to Create
Soft romantic waves are one of the most common creative ideas for prom hairstyles because they provide a balanced combination of elegance and natural beauty. This blowout variation focuses on relaxed waves that appear effortless while still maintaining a refined aesthetic suitable for formal occasions. The style is often included in Pinterest inspiration boards for dresses with flowing fabrics or delicate lace designs.
The defining feature of romantic waves is the gentle, uniform wave pattern that runs through the hair without tight curls or sharp bends. Instead of dramatic volume, the focus is on softness and fluid movement. Hair appears light, airy, and naturally shaped. This makes the hairstyle especially compatible with floral accessories, delicate jewelry, or minimalist prom looks.
Another advantage of romantic blowout waves is their adaptability. The style works well with different hair lengths and can complement both center and side parts. Because the waves are loose and flexible, the hairstyle also holds its shape while still allowing natural movement throughout the evening.
Step-by-Step Guide
Start by applying a lightweight styling cream to damp hair to encourage smooth texture while maintaining flexibility. Comb through the hair to distribute the product evenly before beginning the blowout process.
Divide the hair into manageable sections using clips. Using a large round brush, wrap each section loosely around the brush while directing warm air from the dryer toward the hair. Slowly rotate the brush outward while pulling the hair downward. This technique creates gentle wave formation.
Repeat the process throughout all sections, alternating the direction of the brush occasionally to produce natural variation in the waves. Avoid tight wrapping because the goal is soft flowing movement rather than defined curls.
Once the hair is fully dry, lightly separate the waves using fingers or a wide brush. This step blends the sections together and softens the overall shape. The final result should display smooth, romantic waves with a natural aesthetic perfect for prom styling.
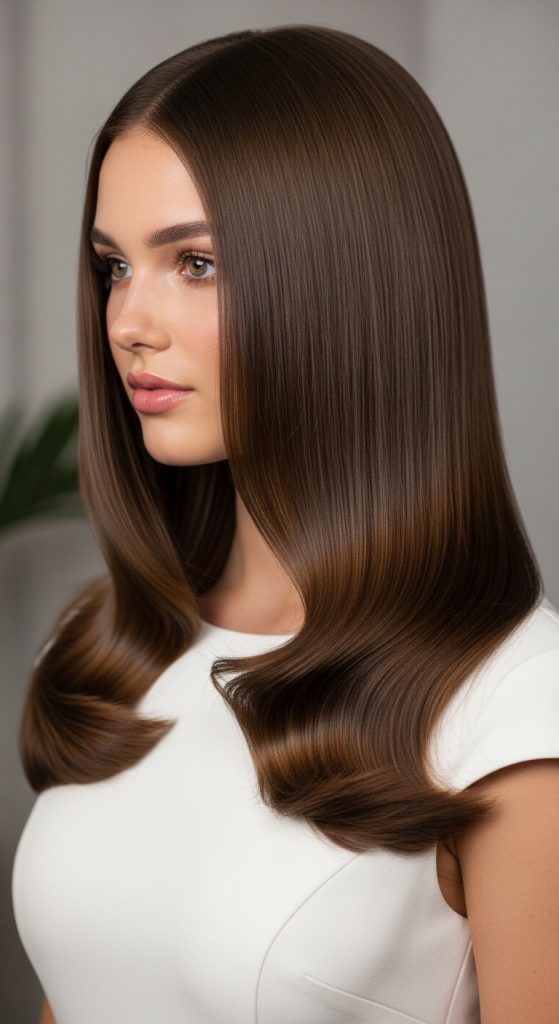
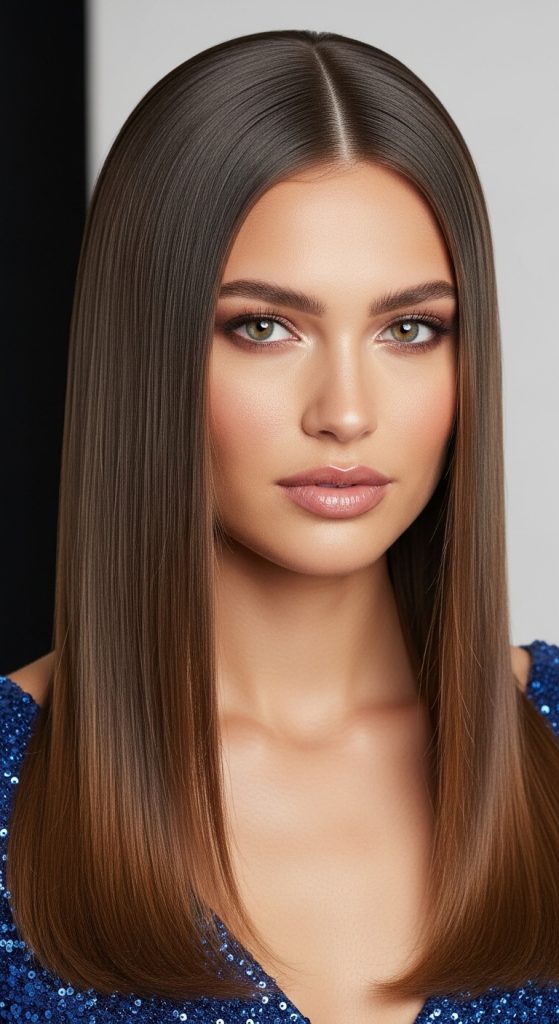
Idea 4: Sleek Straight Blowout
How to Create
The sleek straight blowout is a modern prom hairstyle that highlights simplicity and polished structure. Unlike wave-focused blowouts, this style prioritizes smoothness, shine, and clean lines. It is commonly featured among minimalist style Pinterest ideas for formal events because the hairstyle pairs well with contemporary dresses and structured silhouettes.
The sleek blowout works particularly well for individuals with medium to long hair who prefer a refined and understated appearance. Instead of adding curls or waves, the goal is to create perfectly aligned strands that fall smoothly from the roots to the ends. The overall result is elegant and controlled while still maintaining natural volume.
This hairstyle also emphasizes hair health and shine. Because the strands are straight and uniform, light reflects evenly across the hair surface. This reflective quality creates a glossy appearance that photographs well under formal event lighting.
Execution Process
Begin by applying a smoothing serum or heat protection spray to damp hair. Comb the hair thoroughly to ensure even distribution of the product. Section the hair into several layers using clips.
Starting at the bottom layers, place a flat paddle brush under the hair section while directing the dryer downward along the strands. Maintain consistent tension as you guide the brush slowly from roots to ends. This technique straightens the hair while minimizing frizz.
Continue this step by step method across each section until all layers are smooth and dry. Pay special attention to the front sections near the face, ensuring they remain straight and aligned.
For the final finish, gently run the brush through the entire hairstyle to blend sections together. The completed sleek straight blowout should appear smooth, glossy, and balanced with natural movement.
Idea 5: Side-Part Glam Blowout
How to Create
The side-part glam blowout is a dramatic hairstyle designed to frame the face with volume and movement. This blowout variation focuses on shifting the hair’s natural part to one side, which immediately adds dimension and asymmetry. Pinterest inspiration often highlights this style because it creates a bold prom look without requiring complicated braiding or updos.
A deep side part naturally adds height to the crown while directing waves or volume toward one side of the face. This shape creates a flattering frame that emphasizes facial features and pairs well with formal makeup looks. The hairstyle is especially effective for individuals wearing one-shoulder dresses or gowns with asymmetrical designs.
Another benefit of the side-part glam blowout is that it maintains a balance between structure and softness. While the part creates clear shape, the rest of the hair retains natural movement and volume typical of blowout styling techniques.
Step-by-Step Guide
Start with slightly damp hair and apply a volumizing styling product near the roots. Use a comb to create a deep side part before beginning the blowout process.
Section the hair and begin drying the lower layers using a large round brush. Pull each section away from the face while directing warm air along the hair shaft. This technique creates smoothness while encouraging gentle movement.
When drying the front sections near the side part, lift the hair upward from the roots to increase volume. Wrap the ends around the brush briefly to produce soft waves or curves.
Once the entire head is dry, lightly brush the hair toward the side with the deeper part. This step enhances the asymmetrical shape. The finished hairstyle should display noticeable volume, flowing movement, and a defined side-part structure.

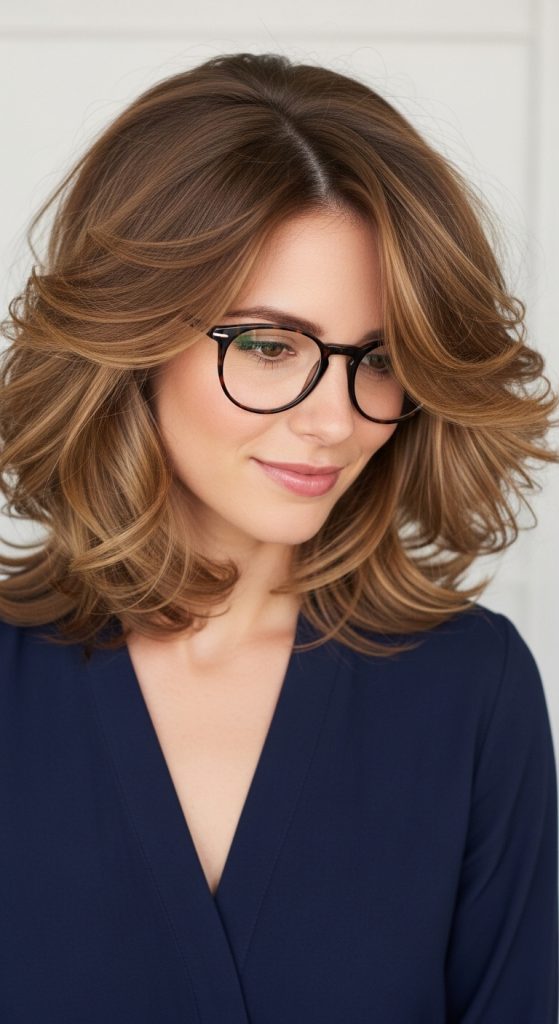
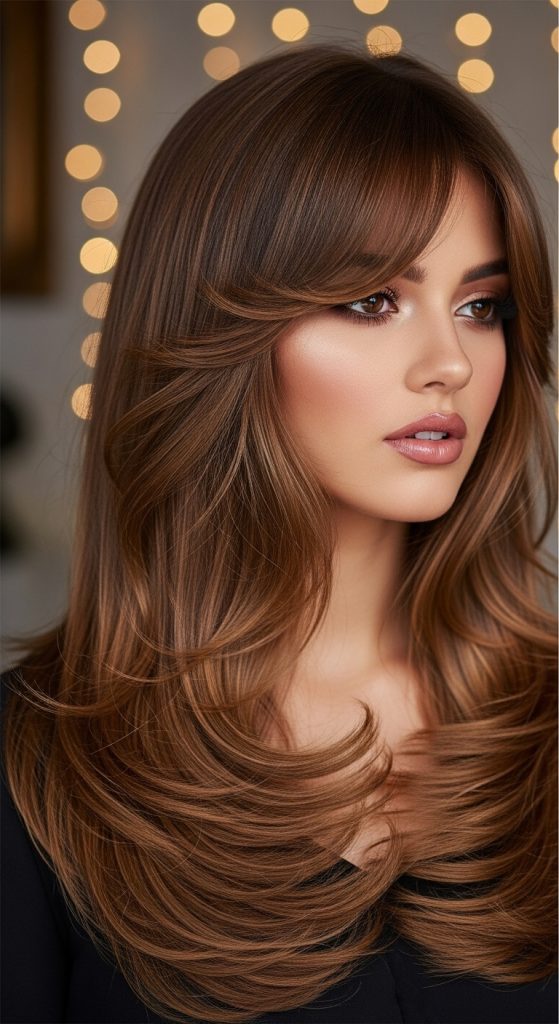
Idea 6: Layered Bounce Blowout
How to Create
The layered bounce blowout focuses on highlighting the natural movement of layered haircuts. This hairstyle is especially effective for individuals with medium or long layered hair because the blowout technique enhances each layer’s shape and dimension. On Pinterest inspiration boards, this style often appears in trending ideas related to lively, energetic hairstyles for formal events.
The defining characteristic of this blowout is the visible bounce created when the layers curve outward or inward. Instead of appearing flat, each layer moves independently, which adds texture and fullness to the hairstyle. The effect creates an energetic look that pairs well with playful or youthful prom outfits.
Layered bounce blowouts also help hair appear thicker. When layers are lifted and curved during the drying process, the hair naturally separates and creates visual depth. This technique works well for those who want volume without heavy teasing or complicated styling methods.
Execution Process
Begin with freshly washed damp hair and apply a lightweight volumizing product. Comb the hair thoroughly to remove tangles and distribute the product evenly. Separate the hair into horizontal sections.
Using a medium round brush, begin drying the bottom layers first. As you reach the ends, rotate the brush outward or inward depending on the direction of the layer. This motion creates the signature bounce associated with layered blowouts.
Continue this step by step process throughout the head, carefully shaping each layer individually. Focus on maintaining consistent tension while pulling the brush through the hair to ensure smoothness.
After drying all sections, gently shake the hair or run fingers through the layers. This separates them and enhances the bouncy effect. The final hairstyle should display lively movement and defined layered structure.
Idea 7: Curtain Bang Blowout Style
How to Create
The curtain bang blowout style highlights face-framing bangs while maintaining the classic fullness of a blowout. Curtain bangs are longer fringe sections that part naturally in the center and sweep toward both sides of the face. This hairstyle has gained popularity among modern Pinterest ideas because it blends retro inspiration with contemporary styling techniques.
Curtain bangs soften facial features while drawing attention to the eyes and cheekbones. When combined with a blowout, the bangs blend seamlessly into the rest of the hair rather than appearing separated. The result is a cohesive hairstyle with natural movement.
This style works particularly well for prom because it frames the face elegantly while allowing the rest of the hair to remain voluminous and flowing. It is also adaptable for both straight and slightly wavy blowout finishes depending on personal preference.
Step-by-Step Guide
Start by applying a lightweight styling cream to damp hair. Separate the curtain bang section from the rest of the hair before beginning the blowout process.
Dry the main sections of hair using a round brush to create smooth volume. Once the base hairstyle is complete, focus on styling the bangs. Place a small round brush under the bang section and direct warm air downward while gently lifting the hair.
Rotate the brush away from the face as the hair dries. This technique creates the signature curtain shape where the bangs split naturally at the center and curve outward.
Blend the bangs with the surrounding hair by brushing the front layers lightly. The finished hairstyle should display soft framing bangs and a balanced blowout shape.
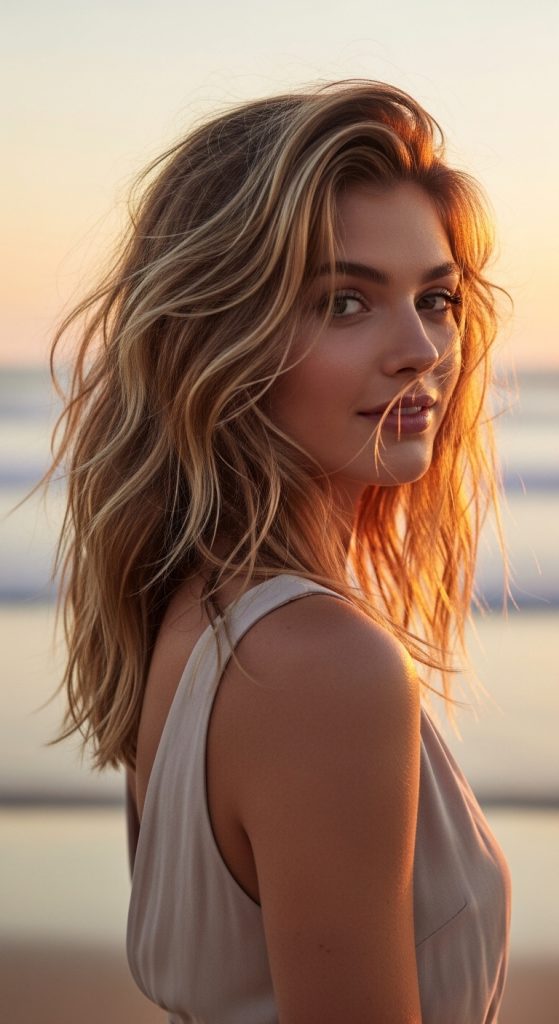
Idea 8: Textured Beach Blowout
How to Create
The textured beach blowout combines the relaxed aesthetic of beach waves with the polished structure of blowout styling. This hairstyle appears frequently in Pinterest inspiration because it creates a balance between casual texture and formal presentation. The result is slightly tousled hair that still appears intentional and styled.
Unlike smooth blowouts, this look embraces subtle texture and uneven wave patterns. The waves appear relaxed rather than perfectly uniform, which creates a natural aesthetic that works well with modern prom fashion. The style pairs well with flowing dresses and bohemian-inspired accessories.
The beach blowout also works for multiple hair lengths and textures. Because the waves are loose and flexible, the hairstyle maintains movement throughout the evening without appearing overly structured.
Execution Process
Begin with damp hair and apply a texturizing styling product. Comb through the hair to distribute the product evenly before beginning the blowout.
Use a medium round brush to dry the hair in sections. Instead of tightly wrapping the hair around the brush, twist sections slightly while directing warm air along the strands. This technique creates irregular waves.
Alternate the direction of the twists while working through the hair. This prevents the waves from appearing too uniform and helps achieve a natural beach-inspired texture.
After completing the blowout, gently separate the waves using fingers rather than a brush. This maintains the textured look. The finished hairstyle should display relaxed waves with soft volume.
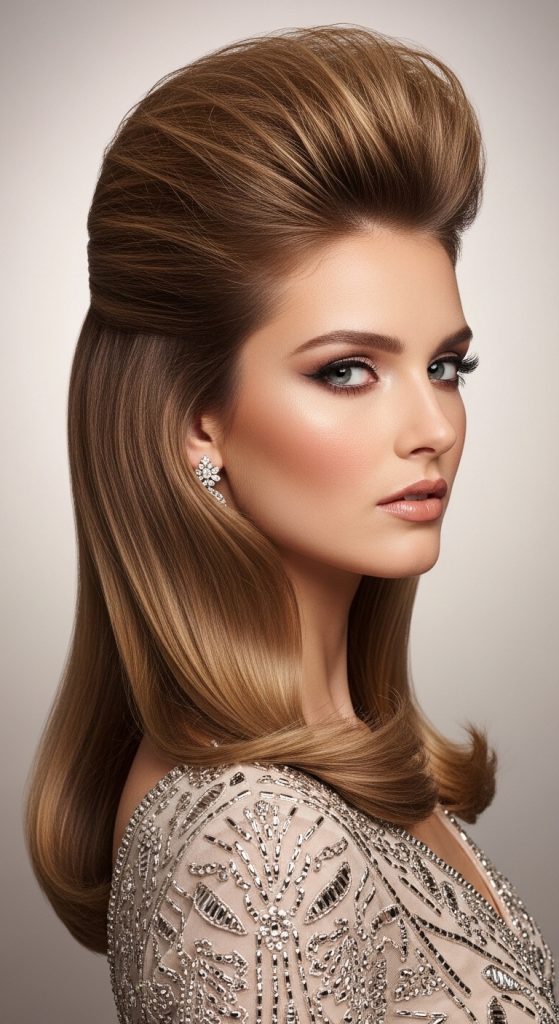
Idea 9: Crown Volume Blowout
How to Create
The crown volume blowout focuses specifically on lifting the hair at the top of the head to create height and dimension. This style is commonly featured in Pinterest ideas for formal hairstyles because it enhances the silhouette of the hairstyle when viewed from multiple angles in photographs.
Volume at the crown helps balance facial proportions and creates a sophisticated shape. Instead of relying on heavy teasing techniques, the blowout method uses controlled airflow and brush positioning to lift the roots naturally.
This hairstyle pairs well with elegant prom dresses and statement earrings because the lifted crown draws attention upward. The rest of the hair can remain softly waved or smooth depending on personal preference.
Setup Method
Apply volumizing mousse directly to the roots of damp hair before drying. Use a comb to distribute the product evenly throughout the top sections of the hair.
While blow-drying the crown area, place a round brush under the roots and lift the hair upward. Direct warm air underneath the section to set the volume while the brush holds the hair in position.
Repeat this step by step process across the crown area before continuing with the rest of the hair. Dry the remaining sections using a standard blowout technique with gentle waves or smooth curves.
After finishing, lightly arrange the hair so the crown remains elevated while the rest of the hair flows naturally. The result should be noticeable height and balanced volume.
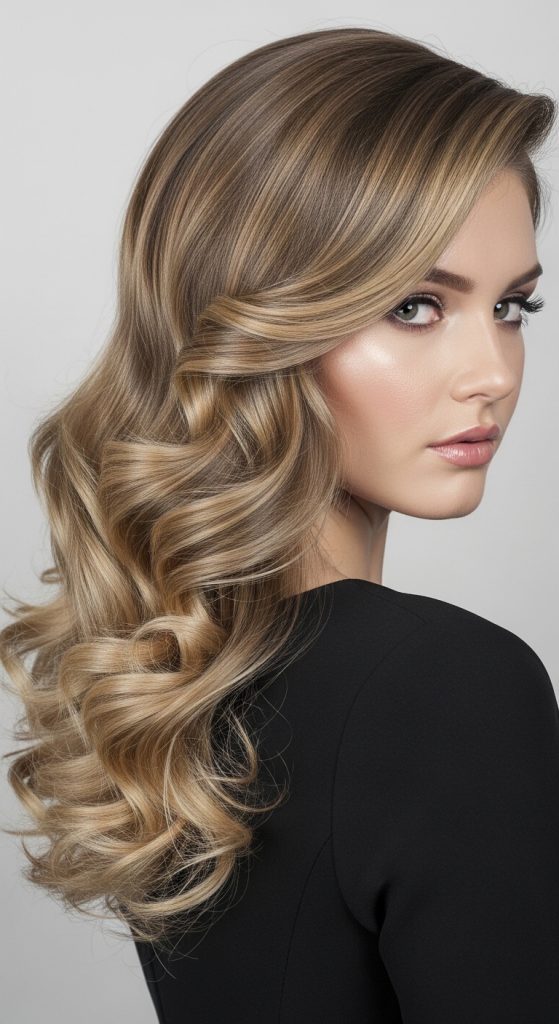
Idea 10: Polished Curled Blowout
How to Create
The polished curled blowout combines the smooth foundation of a blowout with defined curls at the ends of the hair. This hairstyle is often included in Pinterest inspiration boards for formal events because it merges classic elegance with structured styling.
Unlike loose wave blowouts, this style creates more noticeable curl patterns at the ends of the hair while maintaining smooth roots and mid-lengths. The contrast between straight sections and curled ends creates visual interest and dimension.
The polished curl blowout works well with both long and medium hair lengths. It pairs particularly well with classic prom dresses and traditional formal aesthetics.
Step-by-Step Guide
Begin by applying heat protection spray to damp hair before starting the blowout. Dry the hair using a round brush to create smooth, straight strands through the roots and mid-lengths.
When drying the ends of each section, wrap the hair fully around the round brush and hold briefly while directing warm air onto the hair. Allow the section to cool before releasing it to maintain the curl shape.
Repeat this process throughout all sections of the hair, ensuring the curls remain consistent. Once complete, gently separate the curls using fingers to soften the final shape.
The finished hairstyle should feature smooth upper sections with elegant curled ends that move naturally.
Common Beginner Mistakes and How to Avoid Them
One of the most common mistakes in DIY blowout tutorials is attempting to dry large sections of hair at once. Large sections prevent the brush and airflow from shaping the hair properly, which often results in uneven texture or incomplete drying. Dividing the hair into smaller sections allows better control and improves the final shape of the hairstyle.
Another frequent mistake involves directing the hair dryer randomly rather than along the hair shaft. When airflow is aimed upward or across the hair, the cuticle can lift and create frizz. Directing the dryer downward along the strands encourages smoothness and shine.
Skipping heat protection is another avoidable problem. Blowouts rely heavily on heat tools, and protecting the hair helps maintain its health while preserving shine. Additionally, beginners often release sections too quickly before the hair cools. Allowing the hair to cool briefly while wrapped around the brush helps the shape set properly.
By focusing on smaller sections, controlled airflow, proper preparation, and patience during styling, beginners can significantly improve their blowout results.
Practical Tips for Better Results
Achieving a professional-looking blowout at home often depends on technique rather than expensive tools. One helpful strategy is controlling moisture levels before beginning the styling process. Hair that is slightly damp rather than fully wet responds more effectively to shaping and drying.
Using brushes that match hair length is another practical improvement. Larger brushes create loose waves and smooth volume, while smaller brushes help shape shorter layers or bangs. Matching the brush size to the hair section ensures more controlled results.
Maintaining consistent tension while pulling the brush through the hair is also important. Gentle tension smooths the hair cuticle and prevents uneven texture. Beginners should move slowly rather than rushing through sections.
Finally, finishing the blowout with a brief cool airflow helps lock the hairstyle in place. Cooling the hair after shaping sets the structure created during the blowout and improves the hairstyle’s durability during long events such as prom.
Styling, Presentation, or Organization Ideas
The final presentation of a blowout hairstyle can significantly enhance its visual impact during prom. Small styling adjustments help coordinate the hairstyle with dresses, accessories, and makeup. For example, tucking one side of the hair behind the ear highlights earrings and creates asymmetry in the hairstyle.
Hair accessories can also be integrated carefully without overwhelming the blowout structure. Minimal hairpins, decorative clips, or subtle headbands can add visual interest while preserving the natural movement created during the blowout.
Part placement also plays an important role in styling. Center parts create balanced symmetry that complements modern design aesthetics, while side parts add dramatic volume and shape. Adjusting the part slightly can change the overall appearance of the hairstyle.
Organizing hair sections carefully before beginning the blowout also improves the final presentation. Structured sectioning allows the layers to blend smoothly, which creates a cohesive hairstyle that appears professionally styled.
Budget or Time Planning
Planning time effectively is important when preparing a prom hairstyle. Blowout styling typically requires between thirty and sixty minutes depending on hair length and thickness. Allowing sufficient preparation time ensures the hairstyle can be completed calmly without rushing the process.
Budget considerations are also manageable for blowout hairstyles because the required materials are simple and widely available. Basic tools such as a hair dryer, round brushes, and sectioning clips can be used repeatedly for multiple styling sessions. This makes blowouts practical for individuals planning a DIY prom preparation.
Preparing the night before can also save time. Washing and conditioning hair earlier allows the hair to dry partially overnight, which reduces styling time during the final blowout process.
Careful planning ensures that the hairstyle remains a manageable part of prom preparation rather than a stressful last-minute task.
Creative Expansion and Advanced Inspiration
Blowout hairstyles can also serve as a foundation for more advanced creative ideas once the basic technique is mastered. For example, loose braids can be incorporated into a blowout hairstyle to create hybrid looks that combine texture and structure. These variations often appear in trending Pinterest boards for prom inspiration.
Another expansion involves combining blowouts with half-up hairstyles. After completing the blowout, the top portion of the hair can be gathered loosely at the crown while the rest of the hair flows naturally. This style provides structure while maintaining the volume created by the blowout.
Advanced variations may also include decorative hairpins or subtle twists near the temples. These small additions enhance the aesthetic without covering the smooth finish of the blowout.
By experimenting with accessories, parts, and layered styling techniques, a basic blowout can evolve into many unique prom hairstyles that maintain elegance while showcasing personal creativity.